PDF

thoracic spine mobility exercises pdf

Thoracic spine mobility exercises are essential for maintaining flexibility and preventing stiffness in the upper back․ These gentle movements improve posture, reduce muscle tension, and enhance spinal health․ Regular practice boosts flexibility, eases movement, and supports overall well-being․ Incorporating these exercises into your routine can significantly improve daily activities and physical performance․

Why Thoracic Spine Mobility Matters

Thoracic spine mobility is crucial for maintaining proper posture, reducing muscle tension, and preventing injuries․ Improved mobility enhances flexibility, allowing for better movement in daily activities and sports․ It also promotes spinal health by reducing stiffness and discomfort․ Enhanced thoracic mobility can alleviate upper back pain, improve breathing, and support overall physical performance․ Incorporating mobility exercises into your routine helps maintain joint health and prevents long-term issues․ Prioritizing thoracic spine mobility ensures better alignment, reduces strain on surrounding muscles, and fosters a stronger, more flexible upper body․ Regular practice can significantly improve quality of life and physical function․

Key Benefits of Thoracic Spine Exercises

Thoracic spine exercises offer numerous benefits, including improved posture, enhanced flexibility, and reduced upper back pain․ They promote better breathing by expanding chest mobility and strengthen surrounding muscles․ Regular practice alleviates muscle tension, enhances athletic performance, and improves overall spinal alignment․ These exercises also support long-term joint health and reduce the risk of injuries․ By incorporating thoracic spine exercises into your routine, you can experience greater mobility, reduced stiffness, and improved physical function․ Consistency in these exercises fosters a healthier, more flexible spine, contributing to better overall well-being and quality of life․

Understanding the Thoracic Spine

The thoracic spine consists of 12 vertebrae, connecting the cervical and lumbar regions․ It provides structural support, facilitates rib attachment, and enables upper body movement․ Its unique anatomy supports breathing and posture, making it vital for overall spinal function and mobility․

Anatomy of the Thoracic Spine

The thoracic spine comprises 12 vertebrae, each featuring costal facets for rib attachment․ Intervertebral discs provide cushioning, while the spinal canal houses the spinal cord․ Posterior elements include transverse and spinous processes, which serve as muscle attachment points․ The unique structure supports rib movement, enhancing breathing and upper body mobility․ The thoracic spine’s anatomy balances stability and flexibility, with the rib cage adding protection but limiting motion compared to the cervical and lumbar regions․ Understanding this anatomy is crucial for effective mobility exercises, as it highlights the spine’s functional and structural importance․

Common Issues Affecting Thoracic Spine Mobility

Common issues affecting thoracic spine mobility include poor posture, muscle imbalances, and spinal degeneration․ Conditions like kyphosis, scoliosis, and osteochondrosis can limit movement․ Tightness in the chest muscles and weak back muscles often contribute to reduced flexibility․ Additionally, costochondritis and rib misalignments can cause discomfort and stiffness․ Prolonged sitting or repetitive movements may exacerbate these issues, leading to decreased range of motion and discomfort․ Addressing these problems through targeted exercises and proper alignment is essential to restore mobility and alleviate symptoms․

Types of Thoracic Spine Mobility Exercises

Thoracic spine exercises include seated stretches, foam roller mobilizations, and yoga-based movements․ These activities target flexibility, improve posture, and enhance spinal movement, addressing stiffness and discomfort effectively․

Seated Thoracic Spine Exercises

Seated thoracic spine exercises are ideal for improving flexibility and reducing stiffness in the upper back․ One effective exercise is the shoulder brace, where you clasp your hands behind your back and gently squeeze your shoulder blades together while extending your head back․ Another involves arching your spine upward, letting your head relax between your arms, and holding for a count of five before repeating․ Additionally, hollowing your back with elbows straight and neck long can enhance mobility․ These exercises are simple, require minimal equipment, and can be done daily to improve posture, reduce tension, and promote better spinal alignment․

Foam Roller Exercises for Thoracic Mobility

Foam roller exercises are a highly effective way to enhance thoracic spine mobility․ One popular exercise involves placing the foam roller beneath your upper spine and rolling slowly, exhaling as you move․ Another is the arm opener: lie on the roller with knees bent, arms overhead, and gently open your chest․ These exercises target tight muscles, improve spinal flexibility, and promote better posture․ Regular foam roller use can reduce muscle tension and enhance overall thoracic mobility, making daily activities easier and improving spinal health․

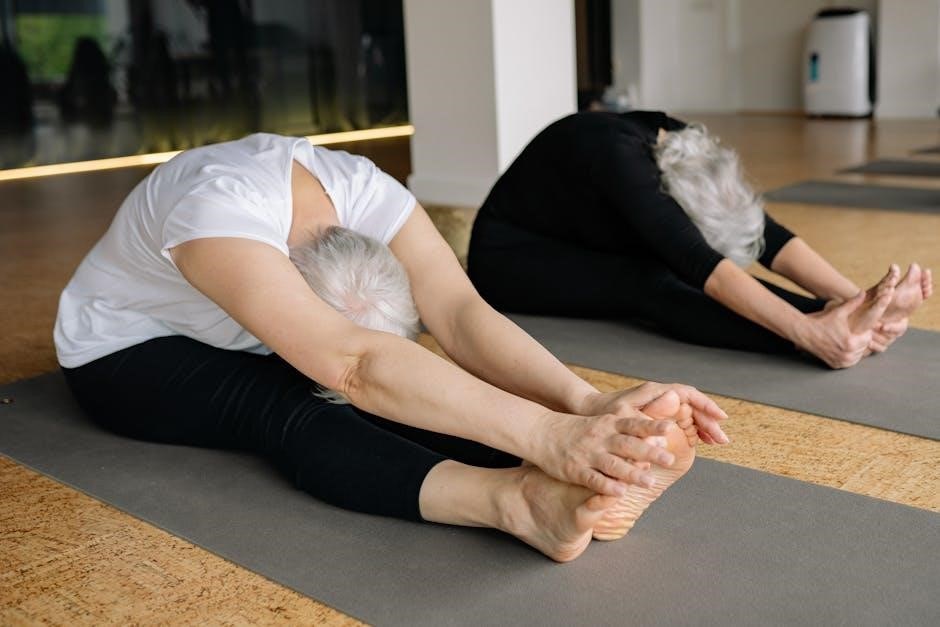
Yoga-Based Thoracic Spine Stretches

Yoga-based thoracic spine stretches are excellent for improving mobility and reducing stiffness․ Cat-Cow stretch is a foundational exercise that gently articulates the spine, promoting flexibility․ Child’s Pose with arm extensions can open the chest and upper back, relieving tension․ Seated Spinal Twist targets the thoracic spine, enhancing rotational mobility and posture․ These stretches, often found in PDF guides, are designed to be low-impact and adaptable to all fitness levels․ Regular practice improves spinal alignment, reduces muscle tightness, and enhances overall thoracic mobility, making daily movements more fluid and comfortable․

Creating a Thoracic Spine Mobility Routine

Develop a balanced routine with 5-10 minutes of daily exercises, including 3-5 key stretches and mobilizations․ Start with gentle warm-ups and finish with cool-down stretches for optimal results․

How to Structure Your Daily Exercise Plan

Begin with a 2-3 minute warm-up to prepare your muscles․ Dedicate 5-7 minutes to foundational exercises like shoulder bracing and seated twists․ Include 3-4 minutes of foam roller mobilizations or yoga-based stretches․ For intermediate levels, incorporate dynamic movements like arm openers or cat-cow stretches for 5 minutes․ Advanced routines can include deep tissue mobilization with a foam roller or resistance bands for 8-10 minutes․ Conclude with 2-3 minutes of cool-down stretches to relax the muscles․ Consistency is key; aim to practice 2-3 times daily for optimal thoracic spine mobility․

Essential Exercises for Beginners

Begin with gentle exercises like shoulder bracing and seated thoracic twists to improve mobility․ Start by bracing your shoulder blades and holding for 5 breaths․ Follow with seated twists, turning gently to each side and holding for 20-30 seconds․ Incorporate foam roller mobilizations by lying on the roller and rolling from the upper to mid-thoracic spine․ Finish with cat-cow stretches to enhance flexibility․ Perform each exercise 3-5 times, focusing on controlled movements․ These foundational exercises are perfect for building mobility and strength in the thoracic spine, helping to reduce stiffness and improve posture․ Consistency is key for lasting benefits․

Advanced Thoracic Spine Mobility Techniques

Dynamic stretching and foam roller mobilization enhance range of motion and target connective tissues․ These advanced methods improve spinal flexibility and reduce muscle tension effectively․

Using a Foam Roller for Deep Tissue Mobilization

A foam roller is an effective tool for deep tissue mobilization, targeting the thoracic spine to improve mobility and reduce muscle tension․ Place the roller along your spine, bend your knees, and find a neutral position․ Slowly roll up and down, focusing on areas of tightness․ Spend 1-2 minutes on each section to release connective tissues․ This technique enhances blood flow, relaxes muscles, and improves spinal flexibility․ Regular use can alleviate upper back stiffness and promote better posture․ Incorporate this method into your routine for sustained spinal health and enhanced range of motion․

Dynamic Stretching for Improved Range of Motion

Dynamic stretching enhances thoracic spine mobility by incorporating controlled movements that improve flexibility and posture․ Start with arm swings, side bends, and gentle twists to warm up the muscles․ Gradually increase intensity with spinal waves or cat-cow stretches, moving slowly to target tight areas․ These exercises promote blood flow, reduce stiffness, and enhance joint mobility․ Incorporate dynamic stretches into your routine to improve range of motion and relieve tension in the upper back․ Consistent practice helps maintain spinal health and supports overall physical performance․

Preventing Injury and Maintaining Progress

Preventing injury requires proper form, gradual progression, and avoiding overexertion․ Monitoring progress ensures continuous improvement without harm․ Incorporate expert guidance and self-care practices for sustained thoracic spine health․

Importance of Proper Form and Technique

Maintaining proper form and technique is crucial for effective and safe thoracic spine mobility exercises․ Incorrect posture or excessive force can lead to muscle strain or injury․ Focus on controlled movements, ensuring neutral spine alignment and proper breathing patterns․ Engage core muscles to stabilize the body during exercises․ Avoid overstretching or bouncing, as this can cause harm․ Use props like foam rollers or chairs to support proper alignment․ Consistency and mindfulness in technique promote long-term benefits and prevent setbacks․ Always consult a healthcare professional or certified trainer to ensure exercises are performed correctly and safely․

Monitoring Progress and Adjusting Your Routine

Regularly monitoring your progress in thoracic spine mobility exercises ensures you stay on track and achieve desired results․ Track improvements in flexibility, posture, and range of motion over time․ Reassess your goals periodically and adjust the intensity or type of exercises as needed․ Use tools like a foam roller to deepen stretches or modify techniques for better alignment․ If progress stalls, consider incorporating dynamic movements or seeking professional guidance․ Adjusting your routine keeps it effective and prevents plateaus, ensuring continuous improvement in spinal mobility and overall well-being․

Resources for Thoracic Spine Mobility Exercises

Find comprehensive guides, instructional videos, and expert recommendations online․ Downloadable PDFs and worksheets provide detailed routines, while forums and communities offer support and personalized advice․

Recommended PDF Guides and Worksheets

Download comprehensive PDF guides and worksheets tailored for thoracic spine mobility․ These resources offer step-by-step instructions, visual aids, and progress tracking tools․ Yoga Flow for a Bendy Spine and Thoracic Foam Roller Exercises are popular choices․ Many guides include dynamic stretches, foam roller techniques, and yoga-based routines․ Worksheets help track daily progress and maintain consistency․ Expert-recommended PDFs like “Enhancing Thoracic Mobility” and “Spinal Health Exercises” provide structured plans for beginners and advanced practitioners․ These resources are ideal for personal use or professional guidance, ensuring a well-rounded approach to improving thoracic spine flexibility and strength․

Online Communities and Expert Recommendations

Join online forums and communities dedicated to thoracic spine mobility for expert advice and support․ Platforms like Reddit’s r/PhysicalTherapy and specialized fitness groups offer valuable insights and exercise tips․ Expert physical therapists and fitness coaches share detailed routines, including foam roller techniques and dynamic stretches․ Many recommend resources like “Yoga Flow for a Bendy Spine” and “Thoracic Foam Roller Exercises” for targeted mobility work․ These communities provide motivation, personalized advice, and access to the latest research and techniques, helping you stay consistent and achieve optimal spinal health․ Engaging with experts and peers ensures a well-rounded approach to your mobility journey․

pillowcase pattern pdf

Pillowcase patterns provide a step-by-step guide to creating beautiful, custom pillowcases. Available as PDF downloads, these patterns offer ease of use and versatility for sewers of all skill levels.

From standard sizes to decorative designs, pillowcase patterns ensure professional finishes and endless customization options, making them perfect for home decor, gifts, or charity projects.

1.1 Overview of Pillowcase Sewing

Pillowcase sewing is a popular DIY project that involves creating custom covers for pillows using fabric and basic sewing techniques. It’s a great way to personalize home decor or create thoughtful gifts. The process typically involves cutting fabric to size, sewing seams, and finishing edges for a polished look. Methods like the burrito technique or French seams are often used for professional results. Pillowcase sewing is simple enough for beginners yet versatile for experienced sewers, offering endless customization options.

1.2 Importance of Using a Pattern

Using a pillowcase pattern ensures accuracy and consistency in your project. Patterns provide precise measurements and step-by-step instructions, reducing mistakes and saving time. They also offer versatility, allowing you to create pillowcases in various sizes and styles. Whether you’re a beginner or an experienced sewer, a pattern guides you to achieve professional-looking results. PDF patterns are particularly convenient, as they are easily downloadable and printable, making the sewing process smoother and more efficient.

Materials and Tools Needed

Essential materials include fabric, thread, and notions like zippers or ribbons. Tools needed are a sewing machine, rotary cutter, ruler, and scissors. Pre-washing fabric ensures proper fit, and using a 1/2-inch seam allowance guarantees professional results.

2.1 Fabric Requirements for Different Sizes

Fabric requirements vary based on pillowcase size. A standard pillowcase typically needs 1 yard of 44/45″ wide fabric, while queen and king sizes may require 1.25-1.5 yards. Baby pillowcases use about 0.5 yards. Ensure fabric is 100% cotton for softness and durability. Directional prints may need slightly more fabric to align patterns. Pre-washing fabric ensures accurate measurements and a professional finish.

2.2 Essential Sewing Tools and Notions

To sew a pillowcase, you’ll need a sewing machine, sharp scissors, rotary cutter, and mat for accurate cutting. A 24″ ruler ensures precise measurements. Basic notions include pins, thread, and a seam ripper. Use a 1/2″ seam allowance for standard pillowcases. Optional tools like a serger can finish seams professionally. Ensure fabric is pre-washed to avoid shrinkage. Free PDF patterns often include detailed lists of required tools and materials for success.

Popular Pillowcase Sewing Methods

Popular methods include the Burrito Method, hiding seams for a clean finish, and the French Seam Technique, offering a polished, professional look. Both are widely used for pillowcase sewing.

3.1 The Burrito Method

The Burrito Method is a popular technique for sewing pillowcases, known for its quick and efficient process. It involves rolling the fabric like a burrito to hide seams, resulting in a clean finish with no raw edges. This method is ideal for beginners and experienced sewers alike, as it simplifies the construction process. Materials needed include fabric for the body, cuff, and optional accent strips. The method ensures a professional-looking pillowcase with minimal effort. Download the free PDF pattern here for a step-by-step guide.

  • Body fabric
  • Cuff fabric
  • Accent strips (optional)

3.2 French Seam Technique

The French Seam Technique is a method that creates strong and delicate seams, perfect for pillowcases. It involves sewing the fabric twice, first with a 1/4-inch seam and then with a 1/2-inch seam, enclosing the raw edges. This technique is ideal for light fabrics and results in a polished, professional finish. It’s a bit more time-consuming but ensures durability and a clean look. Download the free PDF pattern to learn this classic sewing method.

  • Creates strong, enclosed seams
  • Suitable for lightweight fabrics
  • Results in a professional finish

Pillowcase Sizes and Variations

Pillowcases come in standard, queen, and king sizes, with variations for baby pillows and decorative designs. Patterns often include options for one-yard magic pillowcases and zipper pencil cases.

  • Standard, queen, and king sizes available
  • Customizable for baby pillows
  • Decorative designs for unique styles

4.1 Standard, Queen, and King Sizes

Pillowcase patterns cater to various bed sizes, ensuring a perfect fit. Standard pillowcases measure 30×20 inches, while queen and king sizes accommodate larger pillows. These patterns often include measurements for 100% cotton fabric, ensuring durability and comfort. Finished pillowcases fit standard, queen, or king pillows, making them versatile for any bedroom setting. The designs are easy to follow, even for beginners, and allow for customization to match home decor.

  • Standard: 30×20 inches
  • Queen: 30×30 inches
  • King: 36×20 inches

4.2 Baby and Decorative Pillowcases

Baby and decorative pillowcases add charm to nurseries or living spaces. Patterns often include smaller sizes for baby pillows, typically 16×26 inches. Decorative pillowcases can feature intricate designs, appliques, or embroidery. They’re perfect for personalizing gifts or adding a unique touch to home decor. Many patterns include options for ruffles, lace, or contrasting fabrics, making them ideal for creative customization and gifting.

  • Baby pillowcases: 16×26 inches
  • Decorative options: ruffles, embroidery, appliques

Step-by-Step Sewing Instructions

Clear guides outline cutting, sewing, and finishing steps. Measurements and fabric prep are detailed, ensuring accurate results. Perfect for beginners or charity projects, these instructions guarantee professional finishes.

5.1 Cutting Fabric Accurately

Cutting fabric accurately is crucial for a professional finish. Measure and mark fabric according to the pattern, ensuring correct yardage and alignment. For a standard pillowcase, cut a 30×41″ rectangle from 1 yard of fabric. If using directional prints, adjust the layout to match the design. Use rotary cutters and mats for precise cuts, ensuring edges are straight and seams align properly for a polished result.

5.2 Sewing Seams and Finishing Edges

Sewing seams accurately ensures durability and a polished look. Begin by sewing the side and bottom edges with a ½” seam allowance. For a professional finish, use the burrito method to enclose seams. Alternatively, employ French seams for a clean, fray-free interior. Hem the top edge with a ¼” fold, then a 4″ fold for a decorative cuff. Secure all seams with a final stitch to prevent fraying and ensure a long-lasting pillowcase.

Customization and Embellishments

Personalize pillowcases with unique designs, embroidery, or appliqué. Mix fabric patterns and textures for a vibrant look, ensuring a custom fit for any home decor or theme.

6.1 Adding Personalized Designs

Personalized designs elevate pillowcases, making them unique and meaningful. Use embroidery, appliqué, or printed fabrics to add names, patterns, or themes, perfect for gifts or special occasions.

Custom designs allow for creative expression, ensuring pillowcases match personal styles or home decor. This personal touch makes each pillowcase a one-of-a-kind piece, adding charm and character;

6.2 Incorporating Different Fabrics and Patterns

Mixing fabrics and patterns adds texture and visual interest to pillowcases. Combine cotton for durability with satin for a luxurious touch, or blend stripes with florals for a unique look.

Using contrasting fabrics for cuffs, bands, or accents creates a personalized style. This technique allows for endless creativity, making each pillowcase a reflection of individual taste and decor.

Charity and Gifting Ideas

Join the One Million Pillowcase Challenge to donate to those in need. Pillowcases make thoughtful gifts, especially when personalized with names or special messages for loved ones.

7.1 The One Million Pillowcase Challenge

The One Million Pillowcase Challenge encourages sewers to create and donate pillowcases to those in need. This initiative supports charities, hospitals, and shelters, providing comfort and warmth. Participants can use free PDF patterns to sew pillowcases, track donations, and join a community making a difference. It’s a simple yet impactful way to give back while enjoying your sewing hobby.

7.2 Creative Ways to Gift Pillowcases

Transform pillowcases into thoughtful gifts by adding personalized touches. Use vibrant fabrics or embroidery to match recipients’ styles. Pair pillowcases with matching bedding or complementary home decor items for a cohesive look. Consider gifting sets for special occasions like birthdays or holidays. Adding a handwritten note or small memento makes it extra special. Creative packaging, such as rolling them into bundles or tying with ribbons, enhances the presentation and thoughtfulness behind the gift.

Video Tutorials and Resources

Discover step-by-step pillowcase sewing tutorials on YouTube channels like The Crafty Gemini and SewVeryEasy. Find free PDF patterns and detailed guides on websites like AllPeopleQuilt.com.

8.1 Recommended YouTube Channels

For visual learners, YouTube channels like The Crafty Gemini and SewVeryEasy offer excellent step-by-step pillowcase sewing tutorials. The Crafty Gemini showcases the burrito method, while SewVeryEasy provides guidance on sewing various sizes and techniques. These channels are perfect for mastering the craft and exploring creative variations. Additionally, Jen’s tutorials and Laura Coia’s sewing tips are highly recommended for both beginners and experienced sewers.

8.2 Free PDF Patterns and Downloads

Discover a variety of free pillowcase PDF patterns available online, perfect for sewing enthusiasts. Websites like AllPeopleQuilt.com and Fun2Bfrugal.com offer downloadable patterns for standard, queen, and king sizes, as well as baby and decorative pillowcases. These patterns often include step-by-step instructions, making them ideal for beginners. Additionally, some patterns feature customizable options, allowing you to create unique pillowcases with ease.

Tips and Tricks for Beginners

For beginners, start with simple pillowcase patterns and prewash fabrics. Use a walking foot for smooth sewing and follow instructions carefully. Begin with standard sizes and gradually explore decorative options for a polished finish.

9.1 Avoiding Common Mistakes

When sewing pillowcases, common mistakes include incorrect fabric alignment and forgetting to prewash fabrics. To avoid these, ensure patterns are mirrored and edges are aligned properly. Prewash fabrics to prevent shrinkage after sewing. Use a 1/2-inch seam allowance and press seams flat for a professional finish; Avoid stretching fabric while sewing, and double-check measurements before cutting to ensure accuracy and a perfect fit.

9.2 Time-Saving Hacks for Sewing Pillowcases

Use the burrito method to sew pillowcases quickly, as it hides seams and reduces fabric handling. Pre-cut fabric according to your pattern to save time during assembly. Utilize French seams for a clean finish without additional edge finishing. Batch sew multiple pillowcases at once to streamline the process. Invest in a rotary cutter and mat for precise, speedy cutting. Choose patterns with minimal pieces to save time and effort.

dining room table plans pdf

Dining room table plans in PDF format provide detailed, step-by-step guides for building custom tables. They include diagrams, measurements, and material lists, making it easy to create functional and stylish dining tables tailored to any space or décor.

1.1 What Are Dining Room Table Plans?

Dining room table plans are detailed guides for constructing custom dining tables. Typically available as PDF downloads, these plans include step-by-step instructions, diagrams, material lists, and tips. They cater to various styles, from modern to rustic, and skill levels, ensuring users can create functional and aesthetically pleasing tables tailored to their space and preferences. These plans often feature measurements, assembly processes, and finishing techniques, making DIY projects accessible and rewarding.

1.2 Benefits of Using PDF Plans for Your Dining Table

Using PDF plans for your dining table offers numerous benefits, including detailed step-by-step instructions, clear diagrams, and precise measurements. These plans are cost-effective and easily accessible, allowing you to customize your project according to your preferences. They often include material lists and tips, ensuring a smooth building process. PDF plans are also environmentally friendly and can be reused or shared. Whether you’re a DIY novice or an experienced crafter, they provide the clarity and guidance needed to achieve professional-looking results.

1.3 Where to Find Reliable Dining Table Plans Online

Reliable dining table plans can be found on woodworking websites, DIY forums, and online marketplaces. Popular platforms include Etsy for digital downloads, Ana-White for free plans, and YouTube for video tutorials. Many woodworking communities offer detailed PDFs with step-by-step instructions. Additionally, websites like Pinterest and Instructables feature user-shared designs. Always read reviews and check for updated versions to ensure accuracy and quality before purchasing or downloading any plans.

Choosing the Right Dining Table Plan

Choosing the right dining table plan involves considering style, size, material, and personal preferences to ensure it fits your space and enhances your home’s aesthetics.

2.1 Factors to Consider: Style, Size, and Material

When selecting a dining table plan, consider the style to match your home’s décor, size to fit your room, and material for durability and aesthetics. Styles range from modern to rustic, while materials like wood or metal offer different looks. Measure your space to ensure the table fits comfortably, allowing enough room for chairs and movement. The right combination of style, size, and material ensures your table is both functional and visually appealing.

2.2 Popular Dining Table Styles: Modern, Rustic, Farmhouse

Modern dining tables feature clean lines and minimalist designs, often using materials like glass or metal. Rustic styles emphasize natural wood textures and classic, cozy aesthetics. Farmhouse tables are known for their sturdy builds and vintage charm, often with bench seating. Each style caters to different décors, ensuring a perfect fit for any dining space. These popular designs offer versatility, blending functionality with timeless appeal to suit various lifestyles and preferences.

2.3 Measuring Your Space for the Perfect Fit

Measuring your dining area accurately ensures the table fits seamlessly. Consider the room’s dimensions, doorways, and traffic flow. A general rule is to leave at least 36 inches around the table for comfortable seating. PDF plans often include templates or diagrams to help visualize the layout. Measure twice to confirm, ensuring the table complements the space without feeling cramped. Proper measurement leads to a balanced, functional dining area that enhances your home’s aesthetics and usability.

Tools and Materials Needed

Essential tools include a drill, saw, sander, and measuring tape. Materials like wood planks, screws, and wood glue are necessary for durability and aesthetics.

3.1 Essential Tools for Building a Dining Table

A drill, circular saw, and sander are crucial for precise cuts and smooth finishes. Measuring tape, clamps, and a square ensure accuracy. A hammer and screwdriver handle assembly, while safety gear like gloves and goggles protect during the process.

3.2 Recommended Materials for Durability and Aesthetics

Solid hardwoods like oak, maple, or pine are ideal for dining tables due to their strength and timeless appeal. Metal legs or frames offer modern durability, while reclaimed wood adds a rustic charm. For a sleek look, consider engineered wood or laminates. Ensure materials are properly sealed or finished to protect against spills and scratches, enhancing both longevity and visual appeal.

Step-by-Step Guide to Building Your Dining Table

Dining room table plans PDFs offer detailed, step-by-step instructions, guiding you from preparation to final assembly. They include diagrams, tips, and material lists for a seamless project.

4.1 Preparing the Workspace and Plans

Start by clearing a spacious, well-lit workspace and covering it with a protective cloth or plastic. Organize your tools and materials as per the PDF plan. Review the instructions thoroughly to understand each step. Ensure all measurements are accurate and double-check the materials list. Gather sandpaper, clamps, and safety gear to avoid delays. A well-prepared workspace and clear plan are essential for a smooth and successful dining table-building process.

4.2 Cutting and Assembling the Table Top

Begin by cutting the table top planks according to the PDF plan’s measurements. Use a circular saw or jigsaw for precise cuts. Align the planks side by side, ensuring a smooth surface. Apply wood glue between the planks and clamp them tightly to secure. Let the glue dry completely before sanding the edges for a seamless finish. Once dry, attach the planks together using wood screws or brackets for added stability. Double-check the table top’s dimensions before proceeding to the next step.

4.3 Constructing the Table Legs and Base

Cut the table legs and base components according to the PDF plan’s specifications. Use a miter saw for precise angled cuts if required. Assemble the base frame using wood screws and wood glue, ensuring it is square and sturdy. Attach the legs to the base using brackets or screws, depending on the design. Sand all edges for a smooth finish. Double-check the base for levelness and stability before moving on to the next step in the assembly process.

4.4 Sanding, Finishing, and Assembly

Begin by sanding all surfaces to ensure a smooth finish. Apply stain, paint, or sealant according to your desired aesthetic, allowing each coat to dry completely. Once the finish is dry, assemble the table by attaching the tabletop to the base using screws or brackets. Ensure proper alignment and tighten securely. Finally, inspect the table for any imperfections and address them before use. This step completes the transformation of raw materials into a beautiful, functional dining table.

Customizing Your Dining Table

Customize your dining table by adding a personal touch with colors, designs, or engravings. Incorporate storage solutions like drawers or shelves for functionality and unique style.

5.1 Adding aPersonal Touch: Colors and Designs

5.1 Adding a Personal Touch: Colors and Designs

Personalize your dining table with vibrant colors or elegant designs to reflect your style. Use paint, stain, or natural finishes to complement your dining room decor. Consider adding engravings, carved details, or unique patterns for a distinctive look. Incorporate materials like metal or glass for a modern flair, or opt for rustic finishes for a cozy ambiance. These creative touches will make your table a focal point, blending functionality with artistic expression to enhance your dining space.

5.2 Incorporating Storage Solutions

Add functionality to your dining table by incorporating storage solutions. Built-in shelves, drawers, or cabinets can help keep items like linens, utensils, or place settings organized. Consider adding a bench with storage or a hollow leg design for extra space. These features not only enhance practicality but also maintain a clutter-free dining area, blending seamlessly with your table’s design and improving overall usability for everyday meals or special occasions.

Common Mistakes to Avoid

Measurement errors and uneven surfaces are common pitfalls. Double-check measurements and ensure the table base is level before assembly to avoid wobbling or instability issues.

6.1 Measurement Errors and How to Prevent Them

Measurement errors are a frequent issue when building dining tables. To prevent this, use precise tools like digital calipers and measure twice before cutting materials. Always cross-verify dimensions with your plans to ensure accuracy. Additionally, mark cuts clearly and consider creating a cutting list to organize your materials. Taking these steps will help minimize mistakes and ensure your table fits perfectly in your dining space.

6.2 Avoiding Uneven Surfaces and Wobbly Legs

Uneven surfaces and wobbly legs are common issues that can ruin a dining table’s stability. To prevent this, ensure all legs are of equal length and use a spirit level during assembly. Placing felt pads on the bottom of legs can also stabilize the table. Additionally, reinforce the base with sturdy materials like metal brackets or aprons. Regularly inspect and tighten bolts or screws to maintain balance. A sturdy, even base ensures your dining table remains stable and functional for years to come.

Additional Resources and Support

Explore links to digital downloads, step-by-step guides, and expert tips to enhance your dining table project. Find video tutorials and support forums for troubleshooting and inspiration.

7.1 Online Communities for DIY Enthusiasts

Join online forums and communities dedicated to DIY projects, where enthusiasts share tips, plans, and experiences. Platforms like Etsy, Reddit, and specialized woodworking forums offer valuable resources. Discover inspiration, troubleshoot challenges, and connect with experts who can guide you through building your dining table. Many communities also provide access to free or premium PDF plans, ensuring you have the support you need to bring your project to life successfully.

  • Explore forums for DIY enthusiasts.
  • Connect with experts and share ideas.
  • Access free or premium dining table plans.

7.2 Video Tutorials and Expert Tips

Enhance your DIY journey with video tutorials that provide visual guidance for building dining tables. Expert tips from experienced woodworkers and designers offer insights into selecting materials, ensuring precise measurements, and achieving a polished finish. Platforms like YouTube and DIY websites feature step-by-step tutorials, while blogs often share professional advice for common challenges. These resources complement PDF plans, helping you overcome obstacles and create a stunning, functional dining table.

  • Watch tutorials for hands-on guidance.
  • Learn from expert woodworking tips.
  • Enhance your DIY project with visual aids.

redken shades eq color chart pdf

The Redken Shades EQ Color Chart is a comprehensive guide for achieving precise hair color transformations. It organizes shades by level (1-10) and tone (e.g.‚ V‚ G‚ N‚ T)‚ providing a detailed map for professionals and enthusiasts to master color application and correction with ease and accuracy.

What Is the Redken Shades EQ Color Chart?

The Redken Shades EQ Color Chart is a detailed‚ color-coded visual guide that categorizes every shade in the Shades EQ demi-permanent hair glossing line. Organized by level (1-10) and tone (e.g.‚ V‚ G‚ N‚ T)‚ it helps professionals and enthusiasts achieve precise hair color transformations. Each shade represents a unique combination of depth and pigment‚ making it an essential tool for mastering color application‚ correction‚ and customization. The chart is designed to simplify the process of selecting the perfect shade for any hair type or desired result.

Understanding the Redken Shades EQ Chart

The Redken Shades EQ Chart is a structured guide that organizes hair colors by level (1-10) and tone (e.g.‚ V‚ G‚ N‚ T)‚ helping to select the perfect shade for precise results.

Levels in the Redken Shades EQ Chart

In the Redken Shades EQ Chart‚ levels range from 1 (darkest black) to 10 (lightest blonde)‚ indicating the depth of color. Each level represents a gradual progression‚ allowing for precise color matching. Level 1 is deeply pigmented‚ while Level 10 is nearly translucent. This system ensures accurate application and predictable results‚ making it a reliable tool for professionals to achieve desired hair color transformations with consistency and ease.

Tones in the Redken Shades EQ Chart

Tones in the Redken Shades EQ Chart represent the underlying pigments that define the color’s character. Common tone categories include V (Violet)‚ G (Gold)‚ N (Neutral)‚ and T (Taupe). These tones determine whether the color appears warm‚ cool‚ or neutral. For example‚ V tones add a cool‚ ashy dimension‚ while G tones introduce warmth. Understanding tones is essential for achieving desired results‚ as they enhance or neutralize skin tones and eye colors‚ ensuring personalized and precise hair color transformations.

How to Use the Redken Shades EQ Chart

Match your hair’s level and tone to the chart‚ use the color wheel for correction‚ and customize shades based on your hair type for precise results.

Determining Your Hair Level and Tone

To determine your hair level‚ identify its depth on a scale from 1 (black) to 10 (lightest blonde). Tone refers to the underlying pigment‚ such as V (violet)‚ G (gold)‚ or T (taupe). Use the Redken Shades EQ chart to match your hair’s natural or desired shade. For color correction‚ consult the color wheel to find complementary tones. Accurate assessment ensures precise results when selecting shades for application‚ whether for enhancement‚ correction‚ or maintenance of your hair color.

How to Choose the Right Shade for Your Hair

Choosing the right shade involves matching your hair’s natural level and tone to the Redken Shades EQ chart. Consider your desired color outcome and skin tone. For correction‚ use the color wheel to select complementary tones that neutralize unwanted hues. Dilute darker shades with 000 Crystal Clear for softer results. Always test on a strand before full application. Regular touch-ups maintain vibrancy‚ ensuring long-lasting‚ professional-looking results tailored to your hair type and style.

Color Correction with Redken Shades EQ

Redken Shades EQ excels in color correction by neutralizing unwanted tones using the color wheel principle. It enhances natural hues or creates illusions like grey hairlines with ease.

Using the Color Wheel for Color Correction

The color wheel is a fundamental tool for color correction with Redken Shades EQ. By identifying the complementary tone to unwanted pigments‚ professionals can neutralize brassy or red tones effectively. For example‚ green tones cancel red‚ while violet tones neutralize yellow. This method ensures precise correction‚ allowing for the creation of natural-looking results or bold transformations. The color wheel’s principles are key to achieving desired outcomes in hair color adjustments.

Common Color Correction Techniques

Common color correction techniques with Redken Shades EQ include toning‚ glazing‚ and neutralizing unwanted pigments. Toning adjusts the hair’s color to achieve desired warmth or coolness‚ while glazing enhances vibrancy. Neutralizing involves using opposite tones on the color wheel to cancel brassy or red tones. These methods leverage the chart’s level and tone system‚ ensuring precise corrections. Professionals often combine these techniques to refine results‚ making Redken Shades EQ a versatile tool for achieving flawless hair color transformations tailored to individual needs.

Mixing and Application Tips

For optimal results‚ dilute Shades EQ with 000 Crystal Clear or lighter shades. Use a 1:2 color-to-developer ratio and adjust processing times for desired effects.

Pro Tips for Diluting Shades EQ

  • Dilute Shades EQ with 000 Crystal Clear or lighter shades (09 or 010) to reduce tonal deposit and achieve softer results.
  • Use a 1:2 mixing ratio (one part color to two parts developer) for consistent application and desired intensity.
  • For porous hair‚ apply diluted formulas at room temperature for up to 20 minutes to minimize color deposit.
  • Start with small increments when diluting to avoid over-lightening or under-depositing the color.

Mixing Ratios and Processing Times

The standard mixing ratio for Redken Shades EQ is 1:2 (one part color to two parts developer). Processing times typically range from 20 to 30 minutes‚ depending on the desired intensity and hair type. For lighter results or porous hair‚ processing at room temperature for 20 minutes is recommended. Always follow these guidelines to ensure optimal color deposit and avoid over-processing‚ achieving professional-quality results every time;

Redken Shades EQ for Different Hair Types

Redken Shades EQ offers versatile options for all hair types‚ ensuring tailored color results. From porous hair to damaged locks‚ its conditioning properties and customizable formulas cater to diverse needs.

Choosing the Best Shade for Your Hair Type

When selecting a Redken Shades EQ shade‚ consider your hair type and texture. For porous or damaged hair‚ lighter shades with conditioning properties are ideal. For vibrant results on dark hair‚ choose deeper tones like mahogany or copper. Autumn hair types benefit from warm tones‚ while cooler tones suit lighter hair. Use the chart to match your natural color or achieve a desired transformation‚ ensuring the shade complements your hair’s unique characteristics for optimal results.

Customizing Shades EQ for Your Hair

Customizing Redken Shades EQ allows for personalized hair color solutions. Mix different levels and tones to create unique shades that suit your hair’s natural color and desired outcome. For lighter results‚ dilute with 000 Crystal Clear or lighter shades like 09 or 10. Adjust processing times based on hair porosity—up to 20 minutes for lighter deposits. This versatility ensures tailored results‚ whether enhancing natural tones or achieving bold transformations‚ making Shades EQ adaptable to all hair types and preferences.

Maintenance and Longevity of Redken Shades EQ Color

Regular touch-ups and proper care ensure long-lasting Redken Shades EQ color. Use color-protecting shampoos and conditioners‚ and schedule follow-ups to maintain vibrancy and prevent fading over time.

How to Maintain Your Color

To maintain the vibrancy and longevity of your Redken Shades EQ color‚ use sulfate-free shampoos and conditioners formulated for color-treated hair. Avoid hot water‚ which can strip color‚ and limit sun exposure‚ as UV rays can cause fading. Regular touch-ups every 4-6 weeks are essential to refresh the color and prevent dullness. Additionally‚ using a color-depositing mask once a week can help maintain the tone and intensity of your Shades EQ application‚ ensuring your hair remains vibrant and healthy-looking.

Touch-Up and Follow-Up Care

Regular touch-ups are crucial to maintaining the vibrancy of your Redken Shades EQ color. For tonal adjustments‚ use the Shades EQ color wheel to identify complementary tones that neutralize unwanted hues. When touching up‚ apply the formula to regrowth areas and process for 20-25 minutes. For lighter deposits‚ dilute with 000 Crystal Clear or 09/010 shades. Post-care‚ use color-protecting products and avoid heat styling without protection to preserve color intensity and health. Schedule follow-ups every 4-6 weeks for optimal results.

Troubleshooting Common Issues

Common issues with Redken Shades EQ include color fading too quickly or uneven tone. Adjust formulas with 000 Crystal Clear or lighter shades for correction and ensure proper processing times for optimal results.

Common Mistakes and How to Fix Them

Common mistakes when using Redken Shades EQ include choosing the wrong hair level‚ over-depositing color‚ and incorrect processing times. To fix these‚ ensure accurate level selection using the color chart‚ dilute formulas with 000 Crystal Clear or lighter shades to avoid over-depositing‚ and adhere to recommended processing times‚ adjusting for hair porosity to achieve desired results.

Adjusting Color Deposit and Intensity

To adjust color deposit and intensity with Redken Shades EQ‚ dilute formulas using 000 Crystal Clear or lighter shades like 09 or 010. For lighter color deposit‚ use 000 Crystal Clear‚ while 09 or 010 shades are ideal for reducing tonal intensity. Mixing ratios of 1:2 (color to developer) are recommended‚ with processing times adjusted based on hair porosity. Lighter deposits may require up to 20 minutes at room temperature‚ ensuring precise control over color results without over-depositing.

Mastery of the Redken Shades EQ Color Chart empowers professionals and enthusiasts to achieve precise‚ stunning hair color transformations with confidence and creativity‚ ensuring exceptional results every time.

Final Thoughts on Mastering the Redken Shades EQ Chart

Mastery of the Redken Shades EQ Chart unlocks endless possibilities for creating stunning‚ personalized hair color. By understanding its level and tone system‚ professionals and enthusiasts alike can achieve precise results‚ whether enhancing natural hues or correcting unwanted tones. The chart’s versatility‚ combined with expert tips for dilution and mixing‚ ensures tailored outcomes. With practice and creativity‚ this tool becomes an indispensable asset for transforming hair with confidence and artistry‚ making it a cornerstone in modern hair coloring.

1966 chevelle ignition coil wiring diagram pdf chev

The 1966 Chevelle ignition system relies on a high-voltage spark generated by the ignition coil to power engine combustion. A comprehensive PDF wiring diagram provides detailed connections for the ignition coil‚ distributor‚ and spark plugs‚ ensuring proper electrical flow and reliable performance.

1.1 Overview of the Ignition Coil’s Role

The ignition coil is the heart of the 1966 Chevelle’s ignition system‚ functioning as a transformer to convert the battery’s low voltage (12V) into the high voltage (thousands of volts) needed to create a spark. This high voltage is essential for igniting the air-fuel mixture in the engine’s cylinders. The coil’s operation is crucial for proper engine performance‚ and any malfunction can lead to issues like misfires or poor combustion. Its role is central to generating the spark that powers the vehicle‚ making it a vital component for reliable operation.

1.2 Importance of Proper Wiring in the Ignition System

Proper wiring is critical for the 1966 Chevelle ignition system to ensure reliable engine performance. Incorrect connections can lead to voltage drops‚ inconsistent spark delivery‚ and potential damage to components like the ignition coil or distributor. A well-wired system guarantees precise power flow‚ preventing misfires and maintaining optimal combustion. Wiring diagrams are essential for identifying correct connections‚ color-coded wires‚ and component links. Proper wiring also minimizes electromagnetic interference and ensures longevity of the ignition system‚ making it vital for maintaining the vehicle’s overall functionality and efficiency.

Key Components of the 1966 Chevelle Ignition Coil Circuit

The ignition coil‚ distributor‚ and spark plugs are the primary components‚ working together to generate and deliver the high-voltage spark essential for engine operation.

2.1 The Ignition Coil as a Transformer

The ignition coil acts as a transformer‚ converting the battery’s 12 volts into the high voltage required for spark plugs. This process is essential for igniting the air-fuel mixture in the engine’s cylinders. The coil’s primary and secondary windings work together to step up the voltage‚ ensuring a strong spark is delivered through the ignition wires to the spark plugs. Proper wiring‚ as shown in the PDF diagram‚ ensures efficient energy transfer and reliable engine performance.

2.2 The Distributor and Its Connection to the Ignition Coil

The distributor serves as the central component‚ directing high voltage from the ignition coil to the correct spark plug at the right time. It is connected to the ignition coil’s output terminal‚ ensuring the high-voltage spark is distributed efficiently. The distributor cap and rotor work in tandem to guide the spark to each cylinder. The wiring diagram in the PDF highlights this connection‚ showing how the coil’s secondary terminal links to the distributor. Proper wiring ensures precise spark delivery‚ which is critical for smooth engine operation and performance.

2.3 Spark Plugs and Ignition Wires

Spark plugs ignite the air-fuel mixture in the engine’s cylinders‚ while ignition wires deliver high voltage from the ignition coil to the spark plugs. The distributor connects to the spark plugs via these wires‚ ensuring synchronized spark delivery. Ignition wires are typically made of heat-resistant materials like silicone to withstand engine temperatures. Proper routing and connections‚ as shown in the wiring diagram‚ are crucial for reliable spark delivery. Regular inspection and replacement of worn or cracked ignition wires are essential to maintain optimal engine performance and prevent misfires.

Understanding the 1966 Chevelle Ignition Coil Wiring Diagram

The wiring diagram visually maps the ignition system’s electrical connections‚ highlighting the ignition coil’s role in generating high voltage for spark plugs and distributor operation.

3.1 Visual Representation of the Electrical Connections

The wiring diagram serves as a visual guide‚ illustrating the flow of electrical power from the battery to the ignition coil‚ distributor‚ and spark plugs. It outlines the connections between components‚ ensuring proper voltage distribution. Color-coded wires are clearly marked‚ simplifying identification and installation. The diagram also highlights grounding points and capacitor placements for radio interference reduction. This visual representation is crucial for diagnosing issues and performing modifications accurately. By following the PDF diagram‚ enthusiasts can restore or upgrade their 1966 Chevelle’s ignition system with confidence;

3.2 Color Coding and Wire Identification

The wiring diagram uses color coding to simplify wire identification. The positive ignition wire is typically pink‚ while the negative side is often black. Capacitor wires are also color-coded‚ with specific hues indicating their purpose. This system ensures consistency and reduces confusion during installation or troubleshooting. Key wires‚ such as the 12V ignition feed‚ are clearly marked‚ aiding in accurate connections. Variations may exist for different models‚ such as the Corvette‚ but the color coding remains a reliable guide for enthusiasts working on their 1966 Chevelle’s ignition system.

3.3 Diagram Variations for Different Models (Chevy II‚ Chevelle‚ Corvette)

The wiring diagrams for the 1966 Chevy II‚ Chevelle‚ and Corvette differ slightly due to variations in their electrical systems. For example‚ the Corvette diagram specifies an 18 black wire instead of the 12 white or 20 black wires used in other models. The Chevelle diagram highlights the pink wire as the 12V ignition feed‚ while the Chevy II diagram focuses on a more straightforward ignition circuit. These variations ensure accurate wiring for each model‚ preventing confusion during repairs or modifications.

Step-by-Step Guide to Wiring the Ignition Coil

Connect the battery to the ignition coil‚ ensuring proper voltage supply. Link the coil to the distributor for spark distribution. Install capacitors to reduce radio interference.

4.1 Connecting the Battery to the Ignition Coil

Start by attaching the positive battery terminal to the ignition coil’s positive terminal using the appropriate gauge wire. Ensure a secure connection to maintain consistent voltage supply. Ground the negative terminal to the engine block or chassis for proper circuit completion. Refer to the wiring diagram for correct polarity and routing. Avoid any shortcuts to prevent electrical noise or system malfunctions. This step ensures reliable power delivery to the ignition system‚ essential for optimal engine performance.

4.2 Linking the Ignition Coil to the Distributor

Connect the ignition coil’s output terminal to the distributor using a high-tension spark plug wire. Ensure the wire is securely attached to both the coil and distributor cap. Proper routing is essential to prevent cross-firing or interference. The distributor directs the high-voltage spark to the correct cylinder at the right time‚ ensuring efficient combustion. Follow the wiring diagram for accurate connections‚ as misrouting can lead to engine misfires or poor performance. This step is critical for maintaining proper ignition timing and overall engine operation.

4.3 Installing Capacitors for Radio Interference Reduction

To install capacitors for radio interference reduction in your 1966 Chevelle‚ follow these steps:

Locate the Ignition Coil and Distributor: Start by identifying the ignition coil‚ typically found near the distributor. Consult a wiring diagram or repair manual for precise locations.

Connect the Capacitor to the Ignition Coil: Attach the capacitor to the positive terminal of the ignition coil. Ensure the connection is secure to prevent any loose contacts.

Ground the Capacitor: Properly ground the capacitor by connecting it to a metal part of the engine or chassis. This ensures effective noise suppression.

Consider Additional Capacitors: For enhanced interference reduction‚ consider installing capacitors near the spark plug wires. This can further minimize electrical noise.

Select the Correct Capacitor Size: Refer to your wiring diagram or repair manual to choose the appropriate capacitor size to avoid potential damage to the electrical system.

Test the System: After installation‚ test the system to ensure the radio interference is reduced. If interference persists‚ verify all connections and ensure correct installation.
Secure Connections: Use proper tools and insulation‚ such as heat shrink tubing‚ to protect wires and prevent issues like sparks or shorts.

By following these steps and consulting the necessary resources‚ you can effectively reduce radio interference in your 1966 Chevelle’s ignition system.

Troubleshooting Common Issues with the Ignition Coil Wiring

Common issues include faulty connections‚ corrosion‚ and low voltage. Use a multimeter to diagnose electrical flow. Clean or replace corroded wires and ensure proper connections for reliable spark delivery.

5.1 Identifying Faulty Connections or Corrosion

Faulty connections or corrosion in the ignition coil wiring can disrupt the electrical flow‚ leading to engine misfires or no-start conditions. Inspect the wiring harness for visible damage‚ rust‚ or wear. Use a multimeter to test for continuity and identify open circuits. Clean corroded terminals or replace damaged wires to ensure proper conductivity. Pay special attention to connections at the ignition coil‚ distributor‚ and spark plugs‚ as these are common points for corrosion buildup. Regular maintenance can prevent such issues and maintain reliable ignition system performance.

5.2 Diagnosing Low Voltage or No Spark Conditions

Low voltage or no spark conditions in the 1966 Chevelle ignition system often stem from issues like faulty connections‚ corrosion‚ or a malfunctioning ignition coil. Use a multimeter to test the voltage at the ignition coil’s primary and secondary circuits. Ensure the distributor cap and spark plug wires are free from cracks or damage. Verify that the ignition switch and battery connections are functioning properly. If no spark is present‚ check the coil’s resistance and compare it to the manufacturer’s specifications. Addressing these issues can restore proper spark generation and engine performance.

5.3 Resolving Ignition Coil Failures

Ignition coil failures in the 1966 Chevelle can often be traced to faulty wiring‚ corrosion‚ or excessive wear. Begin by consulting the wiring diagram to identify the coil’s connections. Test the battery voltage reaching the coil using a multimeter to ensure it’s receiving the proper 12V supply. Inspect the primary and secondary windings for any signs of damage or wear. Replace the coil if resistance levels deviate from specifications. Additionally‚ check the distributor cap and spark plug wires for cracks or deterioration‚ as these can prevent proper spark formation. Addressing these issues will help restore reliable ignition system performance.

The Importance of a PDF Wiring Diagram for the 1966 Chevelle

A PDF wiring diagram provides a clear‚ detailed visual guide for understanding and repairing the electrical system‚ ensuring accurate troubleshooting and modifications for optimal performance.

6.1 Benefits of a Comprehensive Wiring Guide

A comprehensive wiring guide offers clear‚ detailed schematics‚ simplifying electrical system navigation. It provides precise wire color identification and connection points‚ reducing errors in repairs and upgrades. By ensuring proper installation and troubleshooting‚ it enhances safety and system reliability. Enthusiasts and technicians can quickly identify issues‚ saving time and effort. The guide also supports modifications‚ making it an essential resource for maintaining and enhancing the vehicle’s electrical integrity.

6.2 How to Use the PDF Diagram for Repairs and Modifications

Using the PDF wiring diagram‚ enthusiasts can cross-reference components like the ignition coil‚ distributor‚ and spark plugs. Color-coded wires simplify identification‚ ensuring accurate connections. For repairs‚ locate the faulty circuit using the diagram‚ then trace and test wires. When modifying‚ the guide helps integrate aftermarket parts seamlessly. Detailed descriptions and visual layouts minimize errors‚ while troubleshooting sections address common issues. This resource is indispensable for maintaining or upgrading the electrical system‚ ensuring reliability and performance. Proper use of the PDF diagram guarantees a safer and more efficient workflow.

air fryer cooking times pdf

Air fryer cooking offers a healthier alternative to traditional frying, using minimal oil while delivering crispy results. It’s versatile, efficient, and perfect for various dishes, from snacks to meals.

What is an Air Fryer and How Does It Work?

An air fryer is a kitchen appliance that uses rapid air circulation technology to cook food evenly with minimal oil. It works by circulating hot air around the food at high speed, producing a crispy exterior similar to deep-frying but with much less oil. This innovative cooking method is both efficient and healthy, making it ideal for preparing a wide range of dishes, from snacks to main meals, while maintaining flavor and texture.

Benefits of Using an Air Fryer for Healthier Cooking

An air fryer promotes healthier cooking by significantly reducing oil usage, resulting in lower calorie and fat content compared to traditional frying. It helps retain essential nutrients in food while maintaining crispiness and flavor. The appliance is also energy-efficient, cooks faster than conventional methods, and requires minimal cleanup. These benefits make it an ideal choice for health-conscious individuals seeking delicious, guilt-free meals without sacrificing taste or texture.

Understanding Air Fryer Cooking Times

Mastering air fryer cooking times ensures perfectly cooked dishes. Times vary based on food type, temperature, and portion size. Consistent results require precise adjustments to avoid undercooking or overcooking.

General Guidelines for Cooking Times and Temperatures

Air fryer cooking times and temperatures vary depending on the food type. Vegetables typically cook at 375°F (190°C) for 10-15 minutes, while proteins like chicken or steak may require 400°F (200°C) for 15-20 minutes. Frozen foods often need slightly longer times, around 12-18 minutes. Preheating the air fryer for 3-5 minutes ensures even cooking. Adjusting temperatures and times based on food quantity and desired crispiness is key for optimal results. Always refer to a reliable guide for specific food recommendations.

How Cooking Times Compare to Traditional Frying Methods

Air fryer cooking generally requires less time than traditional deep-frying, with most foods cooking 30-50% faster. For example, fries take about 15-20 minutes in an air fryer compared to 20-30 minutes in oil. Chicken breasts cook in 12-15 minutes, versus 20-25 minutes when fried. The air fryer’s rapid air circulation technology ensures quicker results while using minimal oil, making it a healthier and more efficient option for achieving crispy textures without the wait of traditional frying methods.

Preparation and Preheating Tips

Preheating ensures even cooking, while proper food preparation, like pat drying, enhances crispiness. Avoid overcrowding for consistent results and crispy textures, key for accurate cooking times in your PDF guide.

Importance of Preheating for Even Cooking

Preheating your air fryer ensures consistent cooking temperatures, essential for achieving perfectly cooked dishes. It prevents undercooked spots and promotes even browning. By preheating, you replicate the performance of traditional ovens, making your air fryer cooking times more reliable. This step is especially crucial for proteins and vegetables, ensuring they cook uniformly. Always preheat according to the manufacturer’s guidelines or recipe instructions to maximize flavor and texture in your meals. Consistency is key for successful air fryer cooking.

Essential Preparations Before Cooking

Proper preparation is key to achieving the best results in air fryer cooking. Start by marinating or seasoning your ingredients to enhance flavor. Pat dry foods like meat or vegetables to ensure crispiness. For even cooking, cut ingredients into uniform sizes and remove excess moisture. Lightly oil or spray the basket if needed, but avoid overcrowding. Preparing ingredients according to your recipe ensures optimal cooking performance. These simple steps help you achieve delicious, evenly cooked dishes every time with minimal effort. Consistency starts with proper preparation.

Common Air Fryer Cooking Mistakes to Avoid

Overcrowding the basket and using incorrect temperature settings are common mistakes that affect air fryer results. Avoid these errors for evenly cooked dishes. Consult a cooking guide for precise times and temperatures to ensure the best outcomes.

Overcrowding the Basket and Its Effects

Overcrowding the air fryer basket disrupts airflow, leading to uneven cooking and undercooked food. This mistake can result in steamed, rather than crispy, textures. To avoid this, cook food in batches if necessary, ensuring each piece has enough space. Proper arrangement allows hot air to circulate evenly, ensuring crispiness and consistent cooking. Refer to your air fryer cooking guide for capacity recommendations and adjust portion sizes accordingly for optimal results. This simple adjustment enhances both flavor and texture.

Incorrect Temperature Settings for Specific Foods

Incorrect temperature settings can lead to undercooked or overcooked food. For delicate items like fish, lower temperatures are essential to prevent burning, while heartier foods like meats may require higher heat. Always refer to your air fryer cooking guide for precise temperature recommendations based on the food type. Adjusting the temperature ensures optimal cooking results, preserving flavor, and texture. Proper temperature control is key to achieving perfectly cooked dishes every time. experiment with settings to find the ideal balance for your recipes.

Cooking Specific Foods in the Air Fryer

The air fryer excels at cooking a variety of foods, from crispy vegetables to tender meats and seafood. It’s ideal for snacks like fries, chicken wings, and desserts, delivering flavorful results with minimal oil, making it a versatile kitchen appliance for diverse culinary creations.

Vegetarian and Vegan Air Fryer Options

The air fryer is a fantastic tool for vegetarian and vegan cooking, offering a wide range of delicious, healthy options. From roasted vegetables like cauliflower, broccoli, and Brussels sprouts to hearty dishes like stuffed bell peppers and lentil patties, the possibilities are endless. Tofu and tempeh can be marinated and crispy-fried to perfection, while vegan snacks like sweet potato fries and chickpeas are easy to make. With minimal oil and precise temperature control, the air fryer ensures flavorful, cruelty-free meals that are both nutritious and satisfying. It’s perfect for creating plant-based recipes that are both innovative and mouthwatering.

Cooking Meat, Fish, and Poultry to Perfection

Air fryers excel at cooking meat, fish, and poultry, delivering crispy exteriors and juicy interiors with minimal oil. Chicken breasts, thighs, and wings cook perfectly in 12-15 minutes at 375-400°F. Fish like salmon or cod requires 8-12 minutes at 375°F, while shrimp cooks in just 4-6 minutes. Steak and pork chops benefit from preheating, cooking at 400°F for 10-14 minutes. Marinating and seasoning enhance flavor, and precise temperature control ensures tender, evenly cooked results every time.

Advanced Air Fryer Techniques

Advanced air fryer techniques involve marinating, seasoning, and using accessories for diverse recipes. Precise temperature control ensures perfectly cooked meals with enhanced flavor every time.

Marinating and Seasoning for Enhanced Flavor

Marinating and seasoning are essential for maximizing flavor in air fryer cooking. Marinate meats, poultry, or vegetables in mixes of herbs, spices, and acids like vinegar or yogurt for at least 30 minutes to overnight. Seasoning before cooking ensures a crispy exterior and a flavorful interior. Use aromatic spices, garlic, and paprika for depth, and finish with fresh herbs for brightness. Proper seasoning enhances the natural taste of ingredients, making every dish delicious and aromatic.

Using Air Fryer Accessories for Diverse Recipes

Enhance your air fryer’s versatility with accessories like grill pans, baking trays, and skewers. These tools allow you to cook a wide variety of dishes, from grilled meats to baked goods. They simplify meal preparation and make cooking efficient. With the right accessories, you can explore diverse recipes, catering to different tastes and dietary needs. This opens up endless possibilities for creative and delicious meals, perfect for vegan, keto, or any cuisine.

Creating an Air Fryer Cooking Times PDF Guide

Organize a comprehensive guide with detailed charts, tables, and clear instructions. Include visual aids like infographics for better clarity and easy reference, ensuring users can cook with confidence.

How to Organize a Comprehensive PDF Guide

Start with an introduction explaining the benefits of air fryer cooking. Include a table of contents for easy navigation. Create sections for general cooking times, temperature guidelines, and specific food categories. Add charts comparing air fryer times to traditional frying. Incorporate tips for preheating, marinating, and avoiding common mistakes. Include a section for troubleshooting and FAQs. Use clear headings, bullet points, and visuals to enhance readability. Ensure the guide is printable and mobile-friendly for convenience.

Including Visual Aids and Charts for Clarity

Enhance your PDF guide with visual aids like charts, tables, and images to make cooking times and temperatures easy to understand. Include a temperature-time chart for common foods and images of dishes before and after cooking. Use infographics to highlight key tips, such as preheating times or marinating instructions. Add comparison charts to show how air fryer times differ from traditional frying. Visuals ensure users can quickly reference information, improving their cooking experience and ensuring delicious results every time.

Air fryer cooking simplifies healthy eating with minimal oil, offering crispy results. This guide provides essential times and tips for delicious, efficient meals. Experiment freely for tasty outcomes!

Mastering air fryer cooking involves understanding optimal times, temperatures, and prep. Preheating ensures even cooking, while proper food arrangement prevents overcrowding. Adjusting settings for specific foods enhances results. Patience and experimenting with recipes lead to perfect dishes. Referencing a cooking times PDF guide helps maintain consistency. Balancing flavors through marinades and seasonings elevates meals. Exploring accessories expands recipe diversity. Consistent practice and creativity unlock the full potential of your air fryer, making it an indispensable kitchen tool for healthy, delicious meals.

Final Tips for Experimenting with New Recipes

Start with simple recipes and gradually experiment with new flavors. Use a cooking times PDF guide for reference but don’t hesitate to adjust settings based on your preferences. Marinate or season foods generously to enhance flavor. Avoid overcrowding and ensure even cooking. Don’t be afraid to try unconventional ingredients or combinations. Track your results to refine techniques. Embrace creativity and enjoy the process of discovering new dishes that suit your taste. Happy cooking!

everyman pdf

Everyman is a 15th-century morality play that explores themes of mortality‚ sin‚ and salvation. It follows the protagonist‚ Everyman‚ as he is summoned by Death and embarks on a journey to judgment‚ highlighting the importance of spiritual preparation and moral reflection.

1.1 Overview of the Play

Everyman is a morality play that narrates the journey of its protagonist‚ Everyman‚ who is summoned by Death to account for his life. The play explores themes of mortality‚ sin‚ and redemption as Everyman seeks companions for his final journey. Ultimately‚ only Good Deeds remains faithful‚ emphasizing the importance of moral integrity and spiritual readiness in the face of death.

1.2 Historical Context and Significance

Everyman is a 15th-century English morality play‚ first published around 1520‚ reflecting medieval Christian beliefs on sin‚ repentance‚ and salvation. Its anonymous authorship and allegorical style make it a seminal work in religious drama‚ offering insights into the moral and spiritual values of its time. The play’s enduring relevance lies in its universal themes and its role in preserving medieval theatrical traditions.

Themes and Moral Lessons

Everyman explores universal themes like mortality‚ sin‚ and salvation‚ emphasizing the fleeting nature of material wealth and the importance of spiritual preparation for judgment and eternal life.

2.1 The Universality of Mortality

The play underscores that death is inevitable for all‚ regardless of status or wealth. Everyman’s summons by Death symbolizes the universal human experience of mortality‚ reminding audiences to prepare spiritually for their final judgment and eternal life‚ as material possessions and worldly connections cannot aid in the afterlife.

2.2 Sin‚ Repentance‚ and Salvation

The play vividly portrays Everyman’s journey from sin to repentance‚ highlighting the Christian doctrine of salvation through faith and good deeds. Everyman’s initial disregard for spiritual matters contrasts with his desperate plea for forgiveness as Death approaches‚ emphasizing the necessity of moral accountability and the redemptive power of sincere repentance.

2.3 The Transience of Material Wealth and Beauty

The play underscores the fleeting nature of material wealth and physical beauty through Everyman’s abandonment by Beauty‚ Worldly Goods‚ and Kindred. These characters symbolize the temporary allure of earthly possessions and superficial attractions‚ which vanish when confronted with mortality. Everyman’s journey reveals their ultimate worthlessness‚ emphasizing the futility of relying on them for eternal salvation or true fulfillment.

Structure and Style of the Play

Everyman features a single-act structure‚ emphasizing its moral message through simplicity and directness. Its allegorical style uses symbolic characters to convey universal truths‚ creating a vivid‚ thought-provoking narrative that engages audiences with its straightforward yet profound storytelling.

3.1 Allegorical Characters and Symbolism

The play employs allegorical characters like Everyman‚ Good Deeds‚ Beauty‚ and Worldly Goods to symbolize abstract concepts. These figures represent humanity’s moral and spiritual struggles‚ emphasizing the transient nature of material wealth and the enduring value of virtuous actions. Their interactions illustrate the universal battle between sin and redemption‚ making the play’s moral lessons deeply relatable and timeless.

3.2 The Single-Act Structure and Its Impact

The play’s single-act structure creates a continuous narrative‚ heightening dramatic tension and emphasizing the urgency of Everyman’s journey. This format eliminates scene divisions‚ maintaining a seamless flow that reflects the relentless nature of mortality. The absence of act breaks underscores the inevitability of death and the importance of immediate moral reflection‚ engaging audiences with its unbroken‚ intense progression.

Key Characters in “Everyman”

Everyman features allegorical characters like Beauty‚ Kindred‚ and Worldly Goods‚ who symbolize human attributes. These figures highlight moral lessons‚ emphasizing the transient nature of material wealth and the importance of virtuous deeds.

4.1 Everyman as the Protagonist

Everyman‚ the protagonist‚ represents all humanity‚ embodying universal experiences of sin and redemption. Summoned by Death‚ he symbolizes the common man’s journey through life‚ struggling with moral choices and seeking divine grace. His story serves as a reflection of human frailty and the quest for spiritual salvation‚ making him a relatable and enduring figure in moral literature.

4.2 The Role of Good Deeds

Good Deeds is a central character in Everyman‚ symbolizing the positive actions one undertakes in life. She remains loyal to Everyman‚ even when others abandon him‚ emphasizing the importance of virtuous behavior; Her presence highlights the necessity of good works for salvation‚ as she ultimately aids Everyman in achieving redemption‚ underscoring the moral lesson that deeds shape one’s spiritual fate.

4.3 Other Allegorical Figures: Beauty‚ Kindred‚ and Worldly Goods

Beauty‚ Kindred‚ and Worldly Goods represent fleeting earthly attachments in Everyman. They abandon the protagonist when faced with death‚ illustrating their impermanence. These characters symbolize humanity’s tendency to prioritize transient desires over spiritual well-being‚ serving as a moral warning against the futility of relying on material possessions or superficial relationships for eternal salvation.

The Play’s Ending and Message

The play concludes with Everyman’s realization that only Good Deeds accompany him to judgment‚ emphasizing the importance of virtuous living and spiritual readiness for death.

5.1 The Final Journey and Judgment

Everyman’s final journey begins with Death’s summons‚ forcing him to confront mortality. He seeks companions‚ but Beauty‚ Kindred‚ and Worldly Goods abandon him. Only Good Deeds stand by him‚ highlighting their importance. At judgment‚ Everyman’s deeds determine his fate‚ illustrating the moral that virtuous actions are the true measure of worth in divine eyes.

5.2 The Importance of Spiritual Preparation

The play emphasizes the necessity of spiritual readiness through Everyman’s journey. His scramble to find companions reflects humanity’s tendency to seek earthly comforts over divine grace. Ultimately‚ only Good Deeds prove worthy‚ underscoring the message that true preparation lies in living virtuously and seeking repentance‚ ensuring salvation and a favorable judgment from God.

Accessing “Everyman” in PDF Format

Everyman is widely available in PDF format through various digital archives and platforms. Websites like the Internet Archive and Google Books offer free downloads of the classic play‚ ensuring easy access for readers worldwide to explore its timeless moral lessons and historical significance.

6.1 Sources for Downloading the Play

The play Everyman is available for download in PDF format from reputable sources like the Internet Archive and Project Gutenberg. These platforms offer free access to scanned versions of the original text‚ ensuring that readers can explore the moral lessons and historical significance of the play with ease. Modernized adaptations are also available for enhanced readability.

6.2 Modernized Versions and Adaptations

Modernized versions of Everyman offer contemporary language and spelling while retaining the original moral framework. These adaptations enhance accessibility for modern readers and performers‚ making the timeless themes of mortality and redemption resonate anew. They are available as free PDF downloads‚ ensuring the play’s enduring relevance in today’s cultural and educational contexts.

Theological and Philosophical Insights

Everyman reflects Christian doctrine‚ emphasizing sin‚ repentance‚ and salvation. The play uses allegory to explore the transience of material wealth and the necessity of spiritual preparation for divine judgment.

7.1 Christian Doctrine and Moral Teachings

Everyman is rooted in Christian theology‚ emphasizing the inevitability of divine judgment and the necessity of repentance. The play uses allegorical characters like Good Deeds and Beauty to illustrate moral teachings‚ urging viewers to prioritize spiritual preparation over material wealth‚ reflecting the medieval Christian emphasis on sin‚ redemption‚ and the afterlife.

7.2 The Play’s Relevance in Contemporary Society

Everyman’s universal themes of mortality‚ morality‚ and the fleeting nature of material wealth resonate deeply in modern society. Its exploration of human frailty and the quest for spiritual redemption remains relevant‚ encouraging introspection and self-reflection. Modern adaptations and interpretations continue to draw audiences‚ proving the play’s timeless appeal and its ability to connect with contemporary values and challenges.

Adaptations and Modern Interpretations

Contemporary adaptations of Everyman include stage productions‚ literary reinterpretations‚ and modernized scripts‚ ensuring its timeless themes remain accessible to today’s audiences.

8.1 Stage Productions and Performances

Everyman has been staged in numerous productions‚ blending traditional and contemporary styles. Modern adaptations‚ such as those at the National Theatre‚ bring fresh energy to the timeless narrative. Productions often emphasize universal themes‚ making the play relatable to diverse audiences. These performances highlight the enduring appeal of Everyman as a moral and emotional journey‚ resonating with spectators across generations.

8.2 Literary and Cultural Reimaginations

Everyman has inspired numerous literary and cultural adaptations‚ from modernized scripts to reinterpretations in various media. Carol Ann Duffy’s adaptation and medieval drama versions showcase its versatility. The play’s themes are reimagined in contemporary contexts‚ such as audio plays and e-books‚ ensuring its relevance in modern culture. These reimaginations highlight the timeless universality of its moral and philosophical themes.

Educational and Analytical Resources

Study guides‚ critical essays‚ and academic perspectives on Everyman provide in-depth analysis of its themes‚ structure‚ and historical significance. These resources aid students and scholars in exploring the play’s moral and philosophical dimensions‚ offering insights into its enduring relevance in literature and education.

9.1 Study Guides and Critical Essays

Study guides and critical essays on Everyman provide detailed analyses of its themes‚ characters‚ and historical context. These resources help students and scholars explore the play’s moral and philosophical dimensions‚ offering insights into its structure and language. Modernized scripts and essays enhance comprehension‚ making the play accessible for contemporary readers while preserving its original meaning and significance.

9.2 Academic Perspectives on the Play

Scholars analyze Everyman as a rich allegory exploring Christian morality and human frailty. Academic perspectives highlight its historical significance as a medieval morality play‚ emphasizing its universal themes and symbolic characters. Modern critiques explore its relevance in contemporary discussions on ethics‚ faith‚ and mortality‚ offering deeper insights into its enduring appeal and intellectual depth for scholars and readers alike.

Everyman remains a timeless exploration of human mortality and morality‚ offering profound insights into universal experiences. Its enduring relevance continues to inspire reflection and adaptation across generations and cultures.

10.1 The Timeless Appeal of “Everyman”

Everyman’s enduring appeal lies in its universal themes of mortality‚ sin‚ and redemption. Its allegorical characters and moral lessons resonate across time‚ making it a cornerstone of medieval drama. The play’s simplicity and depth allow modern adaptations to thrive‚ ensuring its relevance in contemporary society and its continued impact on literature and theater.

10.2 The Play’s Enduring Legacy

Everyman remains a cornerstone of medieval drama‚ influencing literature and theater for centuries. Its moral lessons and allegorical structure continue to inspire adaptations and scholarly analysis. The play’s themes of mortality and redemption resonate universally‚ ensuring its relevance in modern times and solidifying its place as a timeless classic of world literature.

decimal multiplication worksheet pdf

Decimal multiplication worksheets provide essential practice for mastering decimal operations, offering structured exercises to improve math skills. Available as free PDFs, they cater to various learning needs, ensuring proficiency in real-world applications like finance and measurement, while offering customizable options for different educational settings;

Overview of Decimal Multiplication

Decimal multiplication involves multiplying numbers with decimal points, requiring careful placement of the decimal in the final product. It is widely used in real-world scenarios, such as calculating measurements and financial transactions. The process resembles whole number multiplication, with an additional step of counting decimal places to position the decimal correctly. Worksheets simplify learning by providing structured practice, ensuring accuracy and fluency in handling decimal operations. Regular practice with these resources helps build confidence and mastery of this essential math skill.

Importance of Practice with Worksheets

Practicing with decimal multiplication worksheets is crucial for developing accuracy and speed in mathematical operations. These resources provide structured exercises tailored to different skill levels, helping students grasp concepts thoroughly. Regular use of worksheets enhances problem-solving abilities, builds confidence, and prepares learners for real-world applications. They also serve as valuable tools for teachers and parents, offering a clear framework to track progress and identify areas needing improvement, ensuring a strong foundation in decimal multiplication skills.

How to Multiply Decimals

Multiplying decimals involves aligning numbers vertically, ignoring the decimal point, and multiplying as with whole numbers. After obtaining the product, place the decimal point to match the total number of decimal places in the original numbers, ensuring accuracy in calculations.

Step-by-Step Guide to Decimal Multiplication

Write the multiplication problem vertically, aligning the decimal points.
Ignore the decimal points and multiply the numbers as whole numbers.
Count the total number of decimal places in both factors.
Place the decimal point in the product so that the number of digits to the right of it matches the total from step 3.
Review the result to ensure proper placement and accuracy. This method ensures clarity and reduces errors in decimal multiplication.

Common Mistakes to Avoid

One of the most frequent errors in decimal multiplication is misplacing the decimal point in the final product. Students often forget to count the total number of decimal places from both numbers, leading to incorrect placement. Another mistake is treating decimals like whole numbers, which can result in overestimation or underestimation of the product. Additionally, rushing through the multiplication process without proper alignment can cause confusion and miscalculations. Practicing with worksheets helps build accuracy and confidence.

Types of Decimal Multiplication Problems

  • Multiplying decimals by whole numbers.
  • Multiplying decimals by decimals.
  • Solving missing factor problems.

Multiplying Decimals by Whole Numbers

Multiplying decimals by whole numbers is a fundamental skill that involves applying standard multiplication techniques while paying attention to decimal placement. Worksheets often include problems like 0.5 × 8 or 3.7 × 4, where students multiply as if the decimal were a whole number, then correctly place the decimal point in the product. These exercises help reinforce understanding of decimal value and prepare students for more complex operations, ensuring accuracy in both mental math and written calculations.

Multiplying Decimals by Decimals

Multiplying decimals by decimals requires careful attention to decimal placement and total digit count. Worksheets often feature problems like 0.5 × 0.3, guiding students to multiply as whole numbers first, then place the decimal based on total digits. This method ensures accuracy and builds foundational skills for real-world applications like financial calculations and measurements. Free PDF resources and interactive tools provide varied exercises, helping students master decimal multiplication through structured practice and progressive difficulty levels.

Missing Factor Problems

Missing factor problems in decimal multiplication worksheets challenge students to find an unknown multiplier or multiplicand. For example, if 0.5 × ___ = 1.25, students must determine the missing number. These exercises enhance critical thinking and problem-solving skills, preparing learners for real-world scenarios where incomplete information is common. Worksheets often include varied missing factor problems, such as 6.4 × ___ = 25.6, encouraging students to apply multiplication strategies flexibly and confidently.

Real-World Applications of Decimal Multiplication

Decimal multiplication is crucial in financial calculations, business transactions, and measurement conversions. It aids in budgeting, product pricing, and scaling recipes, making it an essential skill for practical problem-solving.

Financial and Business Math

Decimal multiplication is vital in financial and business contexts, such as calculating profits, budgeting, and scaling production. It helps determine costs, tax calculations, and investment returns, ensuring accurate financial planning. For example, multiplying decimals is essential for pricing products, managing discounts, and forecasting revenue. Worksheets provide practical exercises to master these skills, enabling professionals to make informed decisions. Real-world applications foster a deeper understanding of financial management and business operations.

Measurement and Unit Conversion

Decimal multiplication is crucial in measurement and unit conversion, enabling precise calculations in various fields like engineering, cooking, and science. Worksheets provide exercises for converting units, such as scaling recipes or calculating material quantities. For instance, multiplying decimals helps in determining volumes, lengths, and weights accurately. These skills are essential for real-world applications, ensuring accuracy in measurements and conversions. Practice through worksheets enhances problem-solving abilities in practical scenarios, making decimal multiplication a fundamental tool for everyday tasks.

Available Resources for Decimal Multiplication

Free PDF worksheets and customizable tools offer comprehensive practice for decimal multiplication. Interactive resources provide tailored exercises, ensuring effective skill development for students of all levels.

Free PDF Worksheets

Free PDF worksheets are widely available online, offering comprehensive practice for decimal multiplication. Websites like Math-Drills.Com and Brighterly provide downloadable resources, featuring various problem types, such as multiplying decimals by whole numbers or other decimals. These worksheets cater to different grade levels, including 5th and 6th grades, and often include answers for self-assessment. Many options are customizable, allowing users to generate new problems for repeated practice. Printable and easy to use, they are ideal for classrooms, homeschooling, or independent study, ensuring mastery of decimal multiplication skills.

Customizable and Interactive Tools

Customizable and interactive tools enhance learning by offering tailored practice for decimal multiplication. Online platforms provide generators that create worksheets with specific problem types, such as multiplying decimals by whole numbers or other decimals. Interactive quizzes and digital exercises offer real-time feedback, engaging students and accelerating skill mastery. Websites like EffortlessMath.com and Math-Drills.Com allow users to adjust problem difficulty and print or download worksheets, making them versatile resources for both classroom and home learning environments;

Common Errors and Solutions

Common errors in decimal multiplication include misplacing the decimal point and mishandling multiple decimal places. Solutions involve careful counting of decimal places and proper alignment during calculations.

Understanding Decimal Placement

Accurate decimal placement is crucial in multiplication. To avoid errors, multiply the numbers as if they were whole numbers, then count the total decimal places in both factors. Place the decimal in the product so that the number of digits to the right matches the total counted. For example, multiplying 0.5 (one decimal place) by 0.3 (one decimal place) gives 0.15 (two decimal places). This step ensures correct alignment and precision in the final result.

Managing Multiple Decimal Places

Mastering decimal multiplication involves correctly managing multiple decimal places. To avoid errors, align the decimals, multiply as whole numbers, then place the decimal in the product based on the total number of decimal places in the factors. For instance, multiplying 0.25 (two places) by 0.4 (one place) results in 0.10 (three places). This method ensures accuracy, especially in complex problems with varying decimal positions, helping to build confidence and precision in math skills.

Answers and Explanations

Decimal multiplication worksheets often include answers and detailed explanations to help students understand their mistakes. Sample problems with solutions provide clear guidance, enhancing learning and progress tracking effectively.

Sample Problems with Solutions

Decimal multiplication worksheets include sample problems with solutions to guide students. For example, 0.5 × 0.3 = 0.15 and 3.7 × 0.4 = 1.48. Each problem is solved step-by-step, showing how to align decimals and count total decimal places. Answers are provided for exercises like 18.7 × 6 = 112.2 and 7.12 × 3 = 21.36. These examples help students verify their work and understand common mistakes, making learning decimal multiplication straightforward and effective for all skill levels.

Self-Assessment and Progress Tracking

Decimal multiplication worksheets often include features for self-assessment and progress tracking, enabling students to evaluate their performance. Many PDF resources provide answer keys and scoring systems, allowing learners to identify strengths and areas needing improvement. Progress tracking charts or tables help monitor development over time. Parents and teachers can use these tools to set goals and celebrate achievements. Regular review of completed worksheets ensures continuous improvement and builds confidence in decimal multiplication skills. Customizable tools further support tailored practice and mastery.

rejected his miracle luna fated her second chance alpha pdf

Rejected His Miracle Luna, Fated Her Second Chance Alpha by Paprika is a captivating werewolf romance novel. It explores themes of rejection, resilience, and love, following Dorothy’s journey from heartbreak to self-discovery.

1;1 Overview of the Novel’s Popularity

Rejected His Miracle Luna, Fated Her Second Chance Alpha has gained significant attention worldwide, captivating readers with its unique blend of werewolf lore and emotional depth. The novel’s popularity stems from its relatable themes of rejection, resilience, and second chances. With over 130 translated chapters and a dedicated fan base, it remains a top choice for romance and fantasy enthusiasts, praised for its engaging storyline and memorable characters.

1.2 Author Background: Paprika

Paprika is a talented author known for crafting emotional and engaging stories. Their work often explores themes of love, resilience, and self-discovery, resonating deeply with readers. With Rejected His Miracle Luna, Fated Her Second Chance Alpha, Paprika has solidified their reputation as a masterful storyteller in the romance and werewolf fiction genres, captivating audiences worldwide with their unique narrative style and character development.

1.3 Key Themes and Genre

Rejected His Miracle Luna, Fated Her Second Chance Alpha delves into themes of love, resilience, and redemption. The novel falls under the romance and werewolf fiction genres, blending emotional depth with supernatural elements. It explores complex relationships, self-discovery, and the transformative power of second chances, creating a compelling narrative that captivates readers seeking emotional and thrilling storytelling experiences.

Plot Synopsis

Rejected His Miracle Luna, Fated Her Second Chance Alpha follows Dorothy, a young woman rejected by her fated mate, uncovering secrets of her past and finding unexpected love in a mysterious stranger.

2.1 Dorothy’s Journey: From Rejection to Redemption

Dorothy’s life takes a dramatic turn when her fated mate rejects her on her 18th birthday. Heartbroken and isolated, she uncovers hidden truths about her past, forming unexpected alliances and discovering love in the most enigmatic of strangers. Her journey is a testament to resilience, self-discovery, and the power of second chances.

2.2 The Role of the Mysterious Stranger

The enigmatic stranger enters Dorothy’s life, offering a glimmer of hope after her rejection. His icy demeanor slowly thaws, revealing a complex character with his own secrets. He becomes a pivotal figure in her journey, aiding her in uncovering the truth about her past and guiding her toward redemption and unexpected love.

2.3 Unveiling the Secrets of Dorothy’s Past

As Dorothy navigates her new reality, long-hidden truths about her lineage and identity surface. The mysterious stranger aids in uncovering these secrets, revealing a history tied to powerful werewolf lore. These revelations not only shape her understanding of herself but also her place within the pack, setting the stage for a transformative journey of self-discovery and acceptance.

Main Characters

Dorothy, the resilient protagonist, faces rejection and discovers love anew. Ignatius, her enigmatic second chance mate, brings mystery and redemption. Supporting characters add depth to her journey.

3.1 Dorothy: The Protagonist’s Struggles and Growth

Dorothy, a resilient and emotional protagonist, faces rejection on her 18th birthday when her destined mate refuses her. This heartbreak sets her on a journey of self-discovery, uncovering hidden truths about her past and forming unexpected alliances. Her growth is marked by resilience, as she learns to embrace her worth and find love in the most unexpected places.

3.2 Ignatius: The Enigmatic Second Chance Mate

Ignatius, Dorothy’s enigmatic second chance mate, enters her life with an air of mystery and a reserved charm. His icy demeanor gradually thaws, revealing a complex character driven by hidden motives. Their bond evolves from tentative trust to deep emotional connection, offering Dorothy a chance at redemption and love, while Ignatius confronts his own unresolved past.

3.3 Supporting Characters and Their Roles

The novel’s supporting characters play pivotal roles in shaping Dorothy and Ignatius’ journey. From mysterious allies to rival pack members, each character adds depth to the story, influencing key decisions and uncovering hidden truths. Their interactions reveal the complexities of pack dynamics and the challenges of second chances, enriching the narrative with diverse perspectives and motivations.

Themes and Symbolism

The novel explores themes of love, resilience, and self-discovery, intertwined with werewolf lore. The wolf symbolizes inner strength, while pack dynamics highlight community and loyalty, enriching the emotional journey.

4.1 The Power of Love and Resilience

Rejected His Miracle Luna highlights the transformative power of love and resilience. Dorothy’s journey from rejection to redemption showcases her strength in overcoming adversity, while her relationships underscore the healing and redemptive aspects of love, proving it as a force that transcends pain and fosters personal growth and acceptance.

4.2 Werewolf Lore and Pack Dynamics

Rejected His Miracle Luna delves into rich werewolf lore, exploring hierarchical pack structures and the significance of fated mates. The novel portrays the Alpha’s authority and the pack’s collective loyalty, blending traditional with fresh twists. Paprika’s portrayal of pack dynamics and lunar influences adds depth, making the supernatural world feel immersive and authentic to readers.

4.3 Self-Discovery and Redemption

Rejected His Miracle Luna masterfully explores Dorothy’s transformative journey of self-discovery and redemption. After facing rejection, she uncovers hidden strengths and her true lineage, leading to personal growth. The novel highlights resilience, showcasing how heartbreak can pave the way for empowerment and unexpected love, ultimately revealing the power of self-acceptance and second chances in a world of werewolf lore.

The Second Chance Trope

Rejected His Miracle Luna delves into the second chance trope, exploring themes of overcoming rejection and finding love again. Dorothy’s journey highlights resilience and destiny’s role in reuniting souls, offering a fresh perspective on love’s transformative power.

5.1 The Concept of Fated Mates

Rejected His Miracle Luna centers on the fated mates trope, where destiny binds two souls, emphasizing the unbreakable connection between Dorothy and Ignatius. The novel explores the emotional turmoil of rejection and the possibility of reuniting with a second chance mate, blending werewolf lore with romantic tension to create a compelling narrative about love, fate, and redemption.

5.2 Overcoming Rejection and Finding Love Again

Dorothy’s journey in Rejected His Miracle Luna highlights her resilience after being rejected by her fated mate. Despite the heartbreak, she discovers love anew through a mysterious stranger, Ignatius, who offers her a second chance. The novel beautifully portrays how overcoming rejection can lead to unexpected happiness, emphasizing the power of love and self-discovery in healing emotional wounds and fostering personal growth.

5.3 The Role of Destiny in the Story

Rejected His Miracle Luna delves into the intricate role of destiny, intertwining Dorothy’s rejection with unexpected encounters. Her path crosses with a mysterious stranger, suggesting fate’s hand in guiding her toward redemption and love. The novel illustrates how destiny shapes lives, offering second chances and transforming rejection into opportunities for growth and unforeseen happiness through its complex narrative.

Where to Read the Novel

Rejected His Miracle Luna can be accessed on platforms like NovelOasis and LeReader. These apps offer full episodes, ensuring readers stay updated with the latest chapters seamlessly.

6.1 Available Platforms and Apps

Read Rejected His Miracle Luna on platforms like NovelOasis and LeReader. These apps offer a seamless reading experience, with all 132 chapters translated and accessible. Regular updates ensure fans stay engaged with Dorothy’s journey, making these platforms the go-to destinations for this captivating novel.

6.2 Accessing the Full Novel

To access the complete Rejected His Miracle Luna, download the NovelOasis app. It offers all 132 chapters, ensuring uninterrupted reading. The app is user-friendly, with regular updates and new content added frequently, allowing readers to fully immerse themselves in Dorothy’s story of love and redemption seamlessly.

6.3 Updates and New Chapters

Stay updated with the latest chapters of Rejected His Miracle Luna by Paprika. Regular updates are available on platforms like NovelOasis, ensuring readers can follow Dorothy’s journey without delay. The most recent chapter, 132, was released on March 31, 2024, keeping fans engaged with new developments and twists in the story seamlessly.

Genre and Audience Appeal

Rejected His Miracle Luna blends romance and werewolf fiction, appealing to fans of emotional, supernatural stories. Its themes of resilience and second chances resonate deeply with its audience.

7.1 Romance and Werewolf Fiction

Rejected His Miracle Luna masterfully combines romance and werewolf fiction, offering a captivating narrative of love, rejection, and resilience. The story delves into supernatural dynamics, providing a fresh take on werewolf lore while maintaining emotional depth. It appeals to fans of both genres, delivering an engaging and unforgettable reading experience.

7.2 Target Audience and Reader Reviews

Rejected His Miracle Luna primarily appeals to fans of romance and werewolf fiction, particularly women who enjoy emotional journeys and second-chance tropes. Readers praise the novel for its relatable protagonist, Dorothy, and the heartfelt exploration of rejection and resilience. Many reviewers highlight the novels’ ability to balance supernatural elements with realistic character development, making it a standout in its genre.

7.3 Why This Novel Stands Out

Rejected His Miracle Luna stands out for its unique blend of emotional depth and supernatural elements. Its fresh take on werewolf lore and the second-chance trope captivates readers. The novels’ ability to weave relatable human struggles with fantastical scenarios creates a compelling narrative that resonates deeply, making it a memorable read in the romance and paranormal genres.

Cultural and Literary Impact

Rejected His Miracle Luna has left a mark on the literary world, resonating deeply with readers and influencing the werewolf romance genre with its emotional depth and unique storytelling.

8.1 Reception in the Literary Community

The novel has garnered significant attention for its unique blend of werewolf lore and emotional depth. Readers and critics alike praise Paprika’s ability to craft relatable characters and compelling plot twists. The story’s exploration of rejection, resilience, and second chances has resonated deeply, making it a standout in the romance and fantasy genres. Its popularity continues to grow, sparking vibrant discussions among book clubs and online forums.

8.2 Fan Engagement and Discussions

Fans worldwide have embraced the novel, sparking lively discussions on platforms like Facebook, forums, and Reddit; Readers enthusiastically analyze Dorothy’s journey, the enigmatic stranger, and the second chance trope. The emotional depth and character development have fostered a strong community, with many sharing fan art and theories about future chapters and character arcs.

8.3 The Novel’s Influence on the Genre

Rejected His Miracle Luna has redefined the werewolf romance genre with its fresh take on fated mates and second chances. Its emotional depth and strong character development have set a new standard, inspiring fan-created content and fostering a sense of community. The novel’s success has encouraged authors to explore similar themes, solidifying its impact on contemporary werewolf fiction.

Reviews and Ratings

Rejected His Miracle Luna boasts a 4.3-star average rating, praised for its emotional depth and engaging storyline. Readers commend Dorothy’s growth and the unique werewolf romance dynamics.

9.1 Reader Feedback and Ratings

Readers enthusiastically praise Rejected His Miracle Luna, with a 4.3-star rating. Many highlight Dorothy’s compelling journey, emotional depth, and the novel’s unique blend of romance and werewolf lore. Fans appreciate the intricate character development and the story’s ability to evoke strong emotions, making it a standout in its genre.

9.2 Critical Acclaim and Analysis

Critics acclaim Rejected His Miracle Luna for its masterful storytelling and emotional resonance. Paprika’s vivid world-building and complex characters are praised, particularly Dorothy’s transformation from rejection to resilience. The novel’s exploration of themes like self-discovery and second chances has been highlighted as its strength, making it a compelling read in the werewolf romance genre.

9.3 Comparisons with Similar Works

Rejected His Miracle Luna stands out among werewolf romance novels for its unique blend of emotional depth and supernatural elements. While sharing themes of rejection and second chances with works like Alpha’s Rejected Mate, Paprika’s storytelling and character development set it apart, offering a fresh perspective in the genre.

Rejected His Miracle Luna is a poignant tale of love, resilience, and self-discovery. With its emotional depth and compelling characters, it leaves a lasting impression, making it a must-read for fans of werewolf romance and heartfelt stories.

10.1 Final Thoughts on the Novel

Rejected His Miracle Luna, Fated Her Second Chance Alpha is a deeply emotional and inspiring novel that masterfully balances heartbreak and hope. With its rich characters and intricate plot, it captivates readers, offering a fresh perspective on werewolf lore and second-chance romance. Paprika’s storytelling shines, leaving a lasting impact and solidifying the novel as a standout in its genre.

10.2 Encouragement to Read

Embark on Dorothy’s transformative journey in Rejected His Miracle Luna, Fated Her Second Chance Alpha. This novel offers a compelling blend of emotional depth, romance, and werewolf lore, making it a must-read for fans of the genre. Dive into a world where resilience and love prevail, and discover why readers worldwide are captivated by Paprika’s storytelling.

10.3 The Lasting Impression of the Story

Rejected His Miracle Luna, Fated Her Second Chance Alpha leaves a profound impact with its exploration of love, redemption, and self-discovery. The novel’s emotional depth and intricate characters create a memorable experience, resonating long after the final page. Paprika’s storytelling masterfully weaves a tale that lingers in the heart, making it a standout in werewolf romance literature.

scales for ukulele pdf

Understanding ukulele scales is essential for mastering various musical styles. With free PDF guides, you can explore major, minor, and blues scales, plus modes like Mixolydian and Dorian.

Why Learning Scales is Important for Ukulele Players

Mastering ukulele scales enhances technical skill, improves improvisation, and expands musical understanding. Scales provide the building blocks for melodies and chords, allowing players to create and innovate. Learning scales also boosts familiarity with the fretboard, making it easier to navigate and play confidently. Whether for composition, improvisation, or enhancing repertoire, scales are a foundational tool for every ukulele player aiming to grow musically. Downloadable PDF guides offer structured lessons and diagrams to simplify the learning process.

Overview of the Most Common Ukulele Scales

The most common ukulele scales include major, natural minor, and pentatonic scales. Major scales like C, G, and D are foundational, offering a bright, uplifting sound. Natural minor scales, such as A, E, and C minor, provide a melancholic tone. Pentatonic scales, including A and E minor, are versatile for improvisation. These scales are widely used across various genres and are essential for building a strong musical foundation. PDF guides offer detailed diagrams and tabs for easy learning.

Understanding Ukulele Scale Diagrams

Ukulele scale diagrams visually represent notes on the fretboard, simplifying scale learning. They show note positions and intervals, making it easier to master scales effectively.

How to Read Scale Diagrams

Reading ukulele scale diagrams involves identifying note positions on the fretboard. Each diagram shows strings vertically and frets horizontally. Open strings are at the top, and numbers indicate frets. Dots mark note positions, and lines connect octaves; Start with the root note and play through the scale, using the diagram to guide finger placement. This method helps build familiarity with the fretboard and improves scale mastery. Print or download PDFs for easy practice and reference.

Key Elements of Scale Diagrams

Scale diagrams for ukulele feature vertical strings and horizontal frets. Open strings are shown at the top, with fret numbers indicated. Dots represent playable notes, and lines connect octaves. Each diagram highlights the root note and scale intervals. Intervals are often marked with letters (W for whole, H for half). This visual layout helps players navigate the fretboard efficiently, ensuring accurate note placement. PDFs often include these elements, making scales easy to follow and practice.

Major Scales for Ukulele in Standard Tuning (gCEA)

Major scales like C, G, and D are foundational in standard tuning. Each scale follows the W-W-H-W-W-W-H interval pattern, covering seven notes. These scales are widely covered in PDF guides.

C Major Scale

The C Major Scale is a fundamental scale for ukulele players, consisting of the notes C, D, E, F, G, A, and B. It follows the interval pattern W-W-H-W-W-W-H, making it a key tool for building melodies and chords. PDF guides often feature diagrams and tablature for this scale, helping players navigate the fretboard. With its bright and cheerful sound, the C Major Scale is a great starting point for beginners and a staple for experienced musicians alike.

G Major Scale

The G Major Scale is a versatile and widely used scale in ukulele music, comprising the notes G, A, B, C, D, E, and F#. Its interval pattern is W-W-H-W-W-W-H, making it a key tool for improvisation and composition. PDF guides often include detailed diagrams and tablature for this scale, providing players with clear fingering patterns. Mastering the G Major Scale is essential for exploring various musical genres and enhancing your ukulele playing skills.

D Major Scale

The D Major Scale on ukulele includes the notes D, E, F#, G, A, B, and C#. Its interval structure is W-W-H-W-W-W-H, offering a bright, uplifting sound. PDF resources provide scale diagrams, tablature, and fingerings to help players navigate the fretboard. This scale is fundamental for creating melodies and solos, and its versatility makes it a valuable addition to any ukulele player’s repertoire, suitable for various musical styles and compositions.

Natural Minor Scales for Ukulele

Natural minor scales provide a melancholic yet foundational sound. Commonly used in various keys, they are essential for creating emotional depth in ukulele music, with resources available in PDF format for easy learning and reference.

A Minor Scale

The A minor scale is a foundational scale often used in melancholic melodies. Its notes are A, B, C, D, E, F, and G. This scale is widely used in various musical genres and is essential for creating emotional depth. With free PDF resources, ukulele players can easily learn and reference the A minor scale, including its fretboard diagrams and finger placements, making it accessible for both beginners and advanced musicians to enhance their playing skills.

E Minor Scale

The E minor scale is a versatile and widely used scale in music, known for its rich, emotive sound. Its notes are E, F#, G, A, B, C, and D. This scale is particularly popular in folk, rock, and blues genres. With free PDF resources, ukulele players can access detailed fretboard diagrams and finger placements, making it easier to learn and master the E minor scale. These resources are invaluable for both beginners and experienced musicians looking to expand their musical repertoire.

C Minor Scale

The C minor scale is a foundational scale in music, consisting of the notes C, D, Eb, F, G, Ab, and Bb. It is widely used in various genres for its melancholic yet powerful sound. Free PDF guides offer detailed diagrams and finger placements for the C minor scale on the ukulele, making it accessible for players of all levels. These resources often include staff notation, tablature, and fretboard visuals, helping musicians master the scale and apply it effectively in their compositions and performances.

Minor Pentatonic and Blues Scales

Minor pentatonic and blues scales are versatile and widely used in various music genres. Free PDF guides provide detailed charts and diagrams for these scales, enhancing your playing.

A Minor Pentatonic Scale

The A minor pentatonic scale is a fundamental scale used in many musical genres. It includes the notes A, C, D, E, and G. This scale is versatile and can be played in various positions on the ukulele fretboard. Free PDF guides provide detailed diagrams and tablature for easy learning. Practicing this scale helps in improving finger dexterity and understanding chord progressions. It’s a great starting point for beginners and experienced players alike.

E Minor Pentatonic Scale

The E minor pentatonic scale is a popular choice for musicians, consisting of the notes E, G, A, B, and D. It is widely used in blues, rock, and folk music due to its emotional depth. Free PDF resources offer detailed diagrams and tablature for this scale, making it accessible to players of all levels. Practicing the E minor pentatonic scale enhances improvisation skills and understanding of chord progressions, making it a valuable tool for any ukulele enthusiast.

Mixolydian Mode for Ukulele

The Mixolydian mode is a versatile scale commonly used in blues and rock music. It adds a distinctive “blue note” to major scales, creating emotional depth. Free PDF guides provide detailed diagrams and tablature for ukulele players to master this mode in standard tuning (gCEA), enhancing their musical versatility and improvisation skills across various genres.

C Mixolydian Scale

The C Mixolydian scale consists of the notes C, D, E, F, G, A, and B♭. It is a major scale with a lowered seventh, creating a distinctive sound often used in blues and rock music. This scale is ideal for improvisation and composition, offering a rich, emotional tone. Free PDF guides provide detailed diagrams and tablature for mastering the C Mixolydian scale in standard tuning (gCEA), helping players explore its versatility and depth in various musical contexts.

G Mixolydian Scale

The G Mixolydian scale includes the notes G, A, B, C, D, E, and F. It is a major scale with a flatted seventh, commonly used in various music genres for its bright yet slightly melancholic sound. Ukulele players can find detailed PDF charts and tablature for this scale in standard tuning, making it easier to learn and apply in both improvisation and songwriting. This scale is versatile and enhances musical expression in numerous styles.

D Mixolydian Scale

The D Mixolydian scale consists of the notes D, E, F#, G, A, B, and C. This scale is a major scale with a flattened seventh, giving it a distinctive, slightly melancholic flavor. It is widely used in various musical genres and is particularly popular in folk and blues music. Ukulele players can access detailed PDF charts and tablature for the D Mixolydian scale, making it easier to master and incorporate into their playing. This scale offers a rich, versatile sound for improvisation and composition.

Dorian Mode for Ukulele

The Dorian mode is one of the seven Greek modes, offering a rich, emotional sound. Its scale formula is 1, 2, b3, 4, 5, 6, b7. Perfect for adding depth to your playing, Dorian mode is widely used in various musical genres. Free PDF resources provide detailed scale diagrams, tabs, and finger placements for C, G, and D Dorian scales, helping you master this versatile mode.

C Dorian Scale

The C Dorian scale is a versatile and expressive scale, offering a rich, emotional sound. Its notes are C, D, Eb, F, G, A, Bb, following the Dorian mode formula (1, 2, b3, 4, 5, 6, b7). This scale is ideal for creating melodic lines in various musical genres, from folk to jazz. Free PDF resources provide detailed diagrams, tabs, and finger placements for mastering the C Dorian scale on the ukulele. Regular practice will help you navigate its unique intervals with confidence and precision.

G Dorian Scale

The G Dorian scale is a soulful and versatile scale, consisting of the notes G, A, Bb, C, D, E, F. It follows the Dorian mode formula (1, 2, b3, 4, 5, 6, b7), creating a rich, emotional sound. Ideal for melodic and harmonic exploration, this scale is widely used in various musical genres. Free PDF guides offer detailed diagrams and tabs, helping you master the G Dorian scale on the ukulele. Regular practice will enhance your ability to navigate its unique intervals with confidence and fluidity.

D Dorian Scale

The D Dorian scale is a popular musical scale with a rich, emotive sound. It consists of the notes D, E, F, G, A, Bb, C, following the Dorian mode formula (1, 2, b3, 4, 5, 6, b7). This scale is widely used in various genres for its distinctive flavor. Free PDF guides provide detailed diagrams, tabs, and fingering patterns to help ukulele players master the D Dorian scale. Regular practice will enhance your ability to play its unique intervals smoothly and confidently, adding depth to your music.

Practical Exercises and Application

Mastering ukulele scales requires consistent practice and real-world application. Start with simple exercises like playing scales over backing tracks or incorporating them into your favorite songs. Use downloadable PDF guides to explore various scales and modes, enhancing your improvisation skills. Regular practice will help you apply scales confidently in diverse musical settings, making your playing more dynamic and expressive.

Exercises to Improve Scale Mastery

Practice scales systematically to build fluency. Start with slow tempos, focusing on clean, clear notes. Use a metronome to gradually increase speed. Play scales over backing tracks to apply them musically. Incorporate scales into improvisation over chord progressions. Explore finger independence exercises and alternate picking for smoother transitions. Download PDF guides for scale diagrams and finger placements to enhance your practice routine. Regular, focused practice will help you master scales and improve your overall ukulele playing.

Applying Scales in Real-World Playing

Mastering scales enhances your ability to create solos, melodies, and improvisations. Apply major and minor scales to craft emotional, genre-specific sounds, from rock to blues. Use scales to improvise over chord progressions, ensuring smooth transitions between notes. Experiment with pentatonic and blues scales for a authentic feel in popular music. Understanding scales allows you to connect chords seamlessly, adding depth and creativity to your playing. This practical application transforms scales into a powerful tool for real-world musicianship.

Exploring ukulele scales opens doors to musical versatility and creativity. With resources like PDF guides, you can master major, minor, and modal scales, enhancing your playing. Regular practice and application of scales in real-world scenarios will deepen your understanding and improve your musicianship. Embrace the journey of learning scales to unlock new possibilities and express yourself confidently through music. Download comprehensive PDF charts to continue your growth and enjoyment of the ukulele.